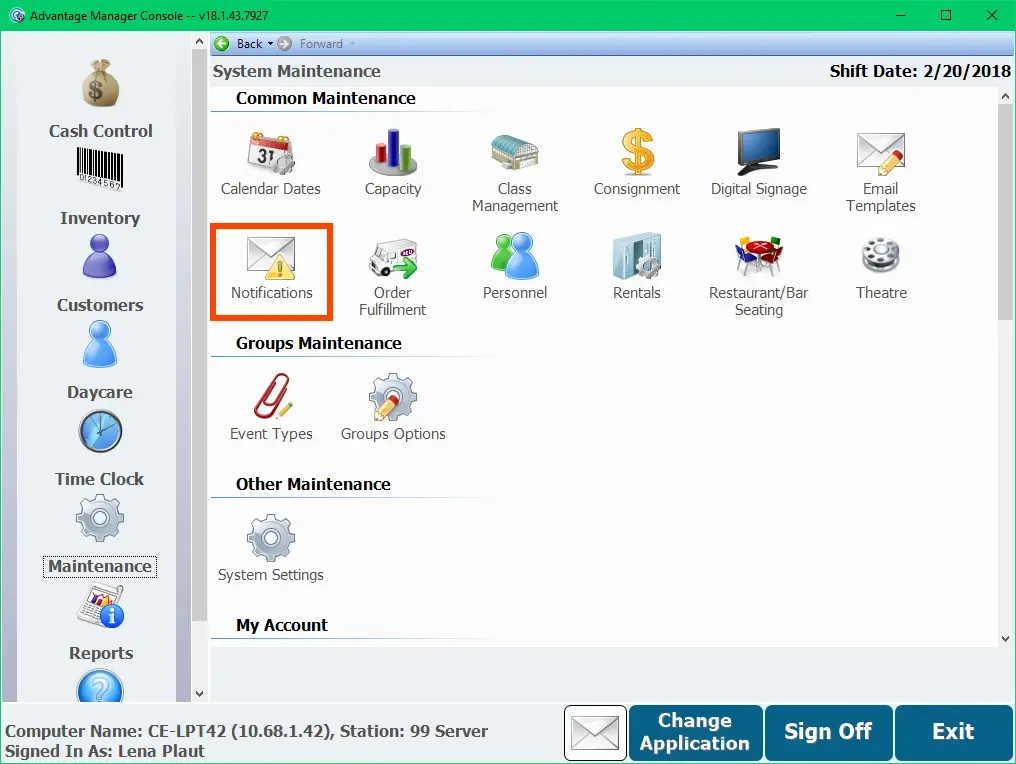
Notifications are automatic communications that can be sent out based on a schedule, or upon certain occurrences. These triggers for sending out messages are called Notification Events, which you configure in Manager Console. The recipients of Notifications can be a pre-configured group of contacts, called a Distribution List, existing Employees based on the contact information in their personnel record, or individual contact Accounts you add. Examples of Notifications include messages to managers when someone indicates they need them at a POS station, automatic thank you emails after an event, or regularly scheduled email reports. To access Notification configuration, double-click Maintenance from Manager Console and double-click Notifications.
There are four options from this screen, which are outlined below.
Notification Options
Notification Options let you select an email account from which to send notifications. You can select a different account from the pull-down list, or click the pencil icon to access Email Options, where you can add or edit accounts. You must have at least one email account configured to send notifications.
Accounts
Each recipient you want to send notifications to, who is not an employee with contact information on file, must have an Account set up with their contact information. You can later add these accounts to Distribution Lists, which are a collection of contacts you want to receive the same notification.
- From the Notifications section of Manager Console, double-click Accounts.
- Click Add.
- Select an Account Type, which indicates the way the recipient will get notifications.
- Most commonly, you will select Email, to send the notification to an email address, or Cell Phone, to send the message to a phone. There are some important differences in how sending a text notification works, which you can read about here.
- Another type you might use is a Printer, which lets you select a printer to print the notification information.
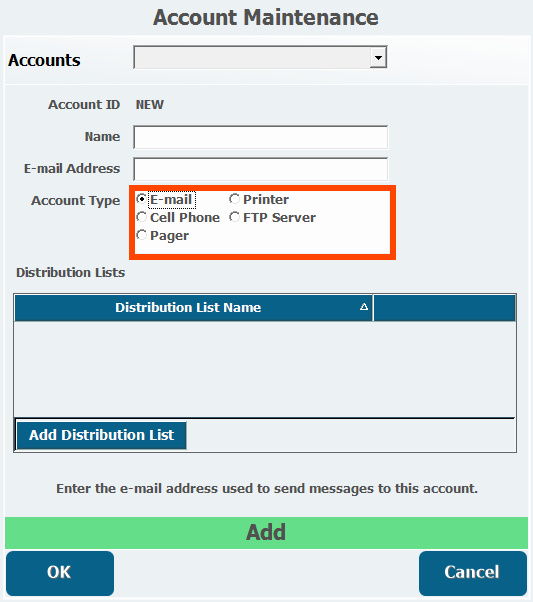
- Enter a Name for the recipient.
- Depending on what Account Type you have selected, enter the E-mail Address, (Cell Phone and Pager types both have an E-mail Address field because the contact information for these must be formatted as and sent through email.) Printer or FTP Server information.
- If you have already created a Distribution List you want to add this contact to, click Add Distribution List to select one.
- Add the contact to as many Distribution Lists as necessary.
- Click OK.
Distribution Lists
Distribution Lists are groups of Accounts and/or Employees you want to send the same notifications to. You might configure a Distribution List for Diner employees, for example, to send a report to all of them on the same days and times. These lists also make it easier to adjust recipients. For example, if you lose a member from your "Managers", you can simply remove them from the Distribution List rather than having to remove them from each notification separately.
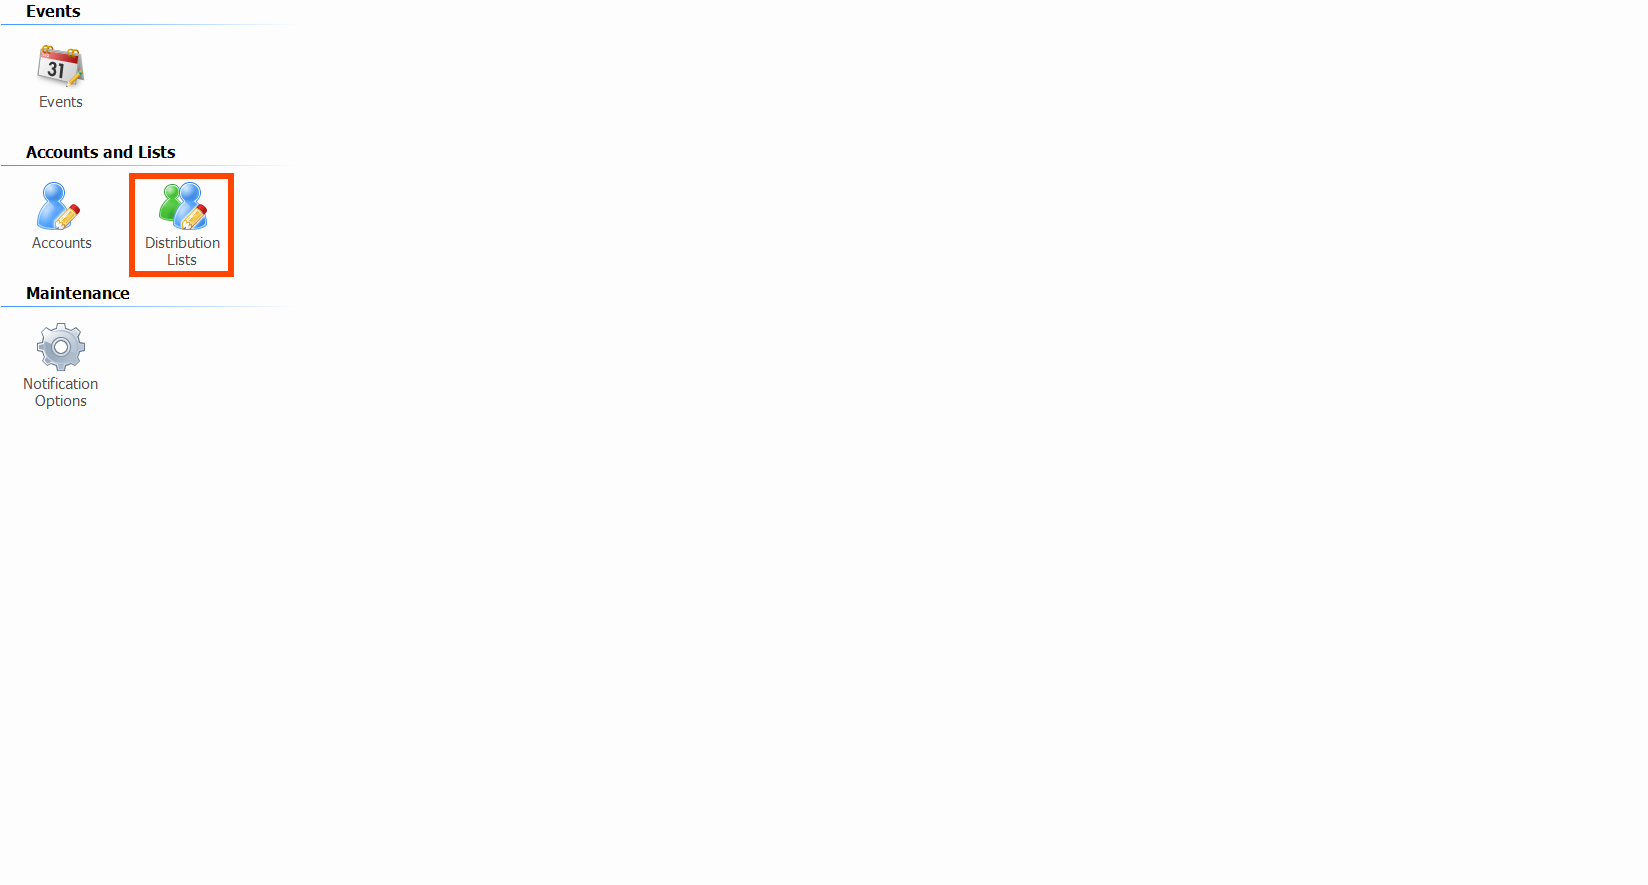
- To create a Distribution List, double-click Distribution Lists.
- Click Add.
- Enter a Name for the list such as "Diner Employees."
- Click Add Target to add an Account or Employee to the list.
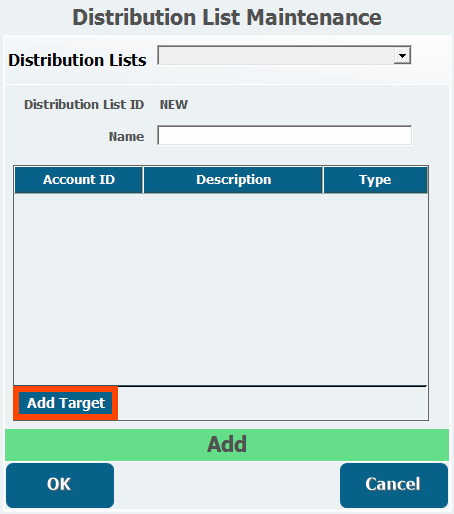
- Select whether the Target (recipient) Type is an Employee, or an Account.
- Select the individual Account or Employee, you want to add.
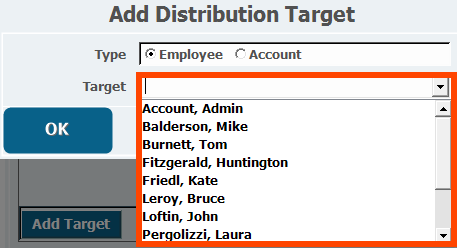
- Click OK.
- Your selection will be added to the list.
- Click Add Target again and repeat this process to add all the recipients you want to include.
- Click OK.
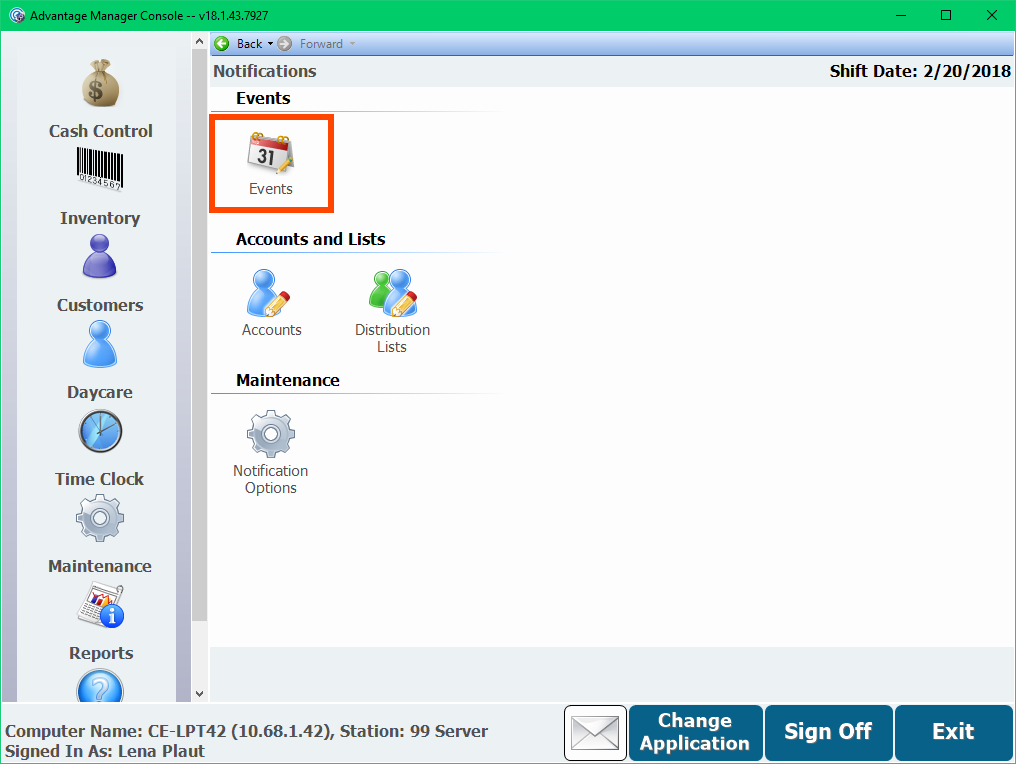
Events
Notification Events refer to the configuration of a Notification. Each Notification Event specifies when to send a notification, who to send it to, and what information to send.
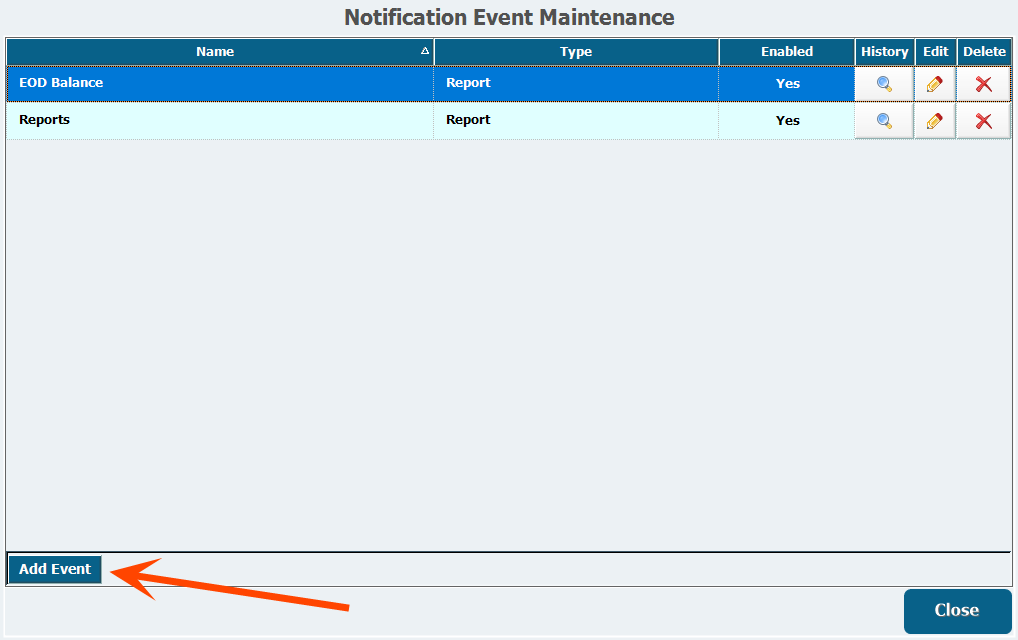
- To create a new Notification Event, double-click Events.
- ClickAdd Event.
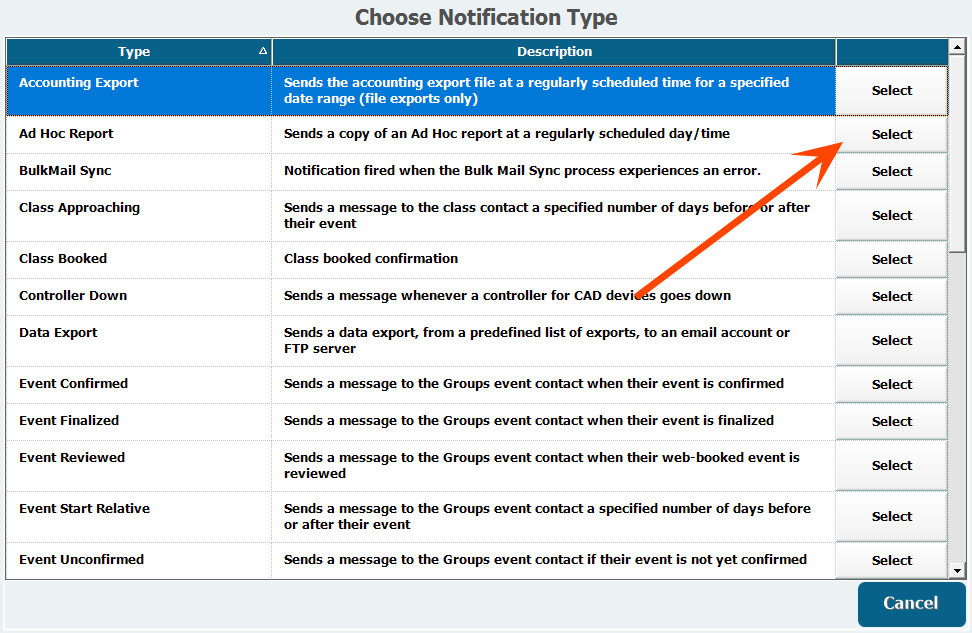
- ClickSelectnext an event Type you want to create.
-
There is a brief Description of what a notification does next to the Type field.

-
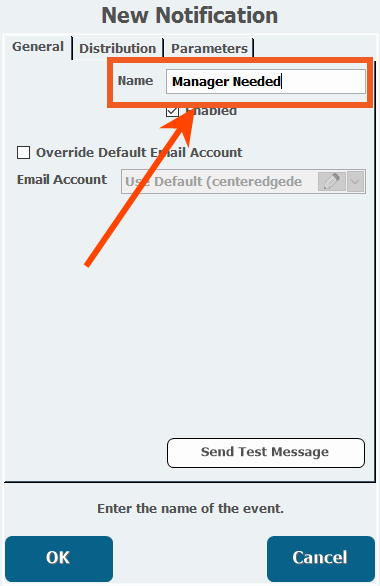
- Enter a Name to clarify what this specific Notification Event will do, such as Cafe Manager Needed.
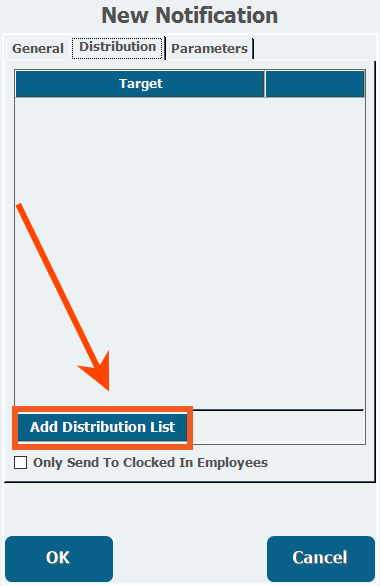
- Open the Distribution tab.
- Click Add Distribution List, which lets you add recipients for the Notification and doesn't necessarily have to include an entire Distribution List.
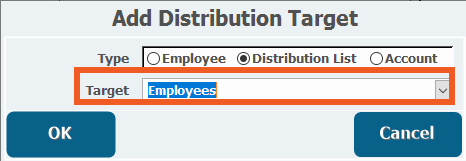
- Select the Distribution List radio button if you want to send the notifications to a previously created list of contacts, select Accountif you want to add a single recipient, or selectEmployeeto add a single employee.
- Select which Employee, Distribution List, or Account you want to send it to from the Target pull-down list.
- Repeat this process to add additional recipients as necessary.
- If applicable, you can select Only Send to Clocked in Employees to exclude employees who are clocked out from receiving the notification.
- Open the Parameters tab.
-
Configure the Parameters available for the Notification Event type you've selected.
See the above expandable list for more information about parameters.
- Click OK.
Scheduled Events
| Event Type | Description |
|---|---|
| Accounting Export | Sends the accounting export file at a regularly scheduled time for a specified date range (file exports only). |
| Ad Hoc Report | Sends a copy of an Ad Hoc report (version 16.6 and above). |
| Data Export | Sends a data export, from a predefined list of exports to an email account or FTP server. |
| Hourly Sales | Sends sales figures for the previous whole hour for the specified division. |
| Report | Sends a copy of a report. Works with e-mail accounts only. |
| Sales | Sends the day's sales figures for the specified division. |
Automatic Events
| Event Type | Description | Parameters |
|---|---|---|
| BulkMail Sync | Notification fired when the Bulk Mail Sync process experiences an error. | None. |
| Controller Down | Sends a message whenever a controller for CAD devices goes down. | Select applicable Engine. |
| Class Approaching | Sends a message to the class contact a specified number of days before or after the class. | Select Email Template, Offset Days, applicable Classes, and applicable Customer Types. |
| Class Booked | Class booked confirmation. | Select Email Template and applicable Classes. |
| Event Confirmed | Sends a message to the event contact when their event is confirmed. | Select Email Template, applicable Event Types, and applicable Customer Types. |
| Event Finalized | Sends a message to the event contact when their event is finalized. | Select Email Template, applicable Event Types, and applicable Customer Types. |
| Event Reviewed | Sends a message to the event contact when their web-booked event is reviewed. | Select Email Template, applicable Event Types, and applicable Customer Types. |
| Event Start Relative | Sends a message to the event contact a specified number of days before or after their event. | Select Email Template, Offset Days, applicable Event Types, and applicable Customer Types. |
| Event Unconfirmed | Sends a message to the event contact if their event is not yet confirmed. | Select Email Template, Offset Days, applicable Event Types, and applicable Customer Types. |
| Manager Needed | Sends a message whenever an employee presses the Need Manager button in POS. | Select applicable Division. |
| Minor Needs A Break | Sends a message when a minor needs a break. | Select applicable Work Department. |
| Minor Needs To Go Home | Sends a message when a minor reaches the daily/weekly work hour maximum. | Select applicable Work Department. |
| New Customer | Sends a message to any new customer added to the system, or any customer who adds their email to the system. | Select Email Template, applicable Customer Type. |
| New Pass Sold | Sends a message to a customer when you sell them a pass if they have an email address on file before the pass is sold. | Select Email Template, applicable Pass Type. |
| Reader Down | Sends a message whenever a CAD device goes down. | Select Engine. |
| Till Cashed In | Sends a message when a till has been cashed in. | Select applicable Division, option for First Till of Day only. |
| Till Over Cash Limit | Sends a message when a till has more than a certain amount of cash. | Select applicable Division, amount to begin alerting, and amount to repeat alert. |
| Till Over/Short | Sends a message whenever a till is closed over or short more than a specified amount. | Select applicable Divison, amount for Overage, and amount for Shortage. |
| Time Off Request Made | Sends a message when a new time off request has been made. | Select applicable Work Department. |
Known Issues
Reports Cut-Off or Printed Too Small
Because it is a Windows Service, the Notification Service uses the Windows SYSTEM account when performing its programmed tasks. This can lead to issues with emailed reports being cut off or printed to a paper of a smaller size than normal. To resolve this issue, you can change the default account the service uses to perform its tasks.
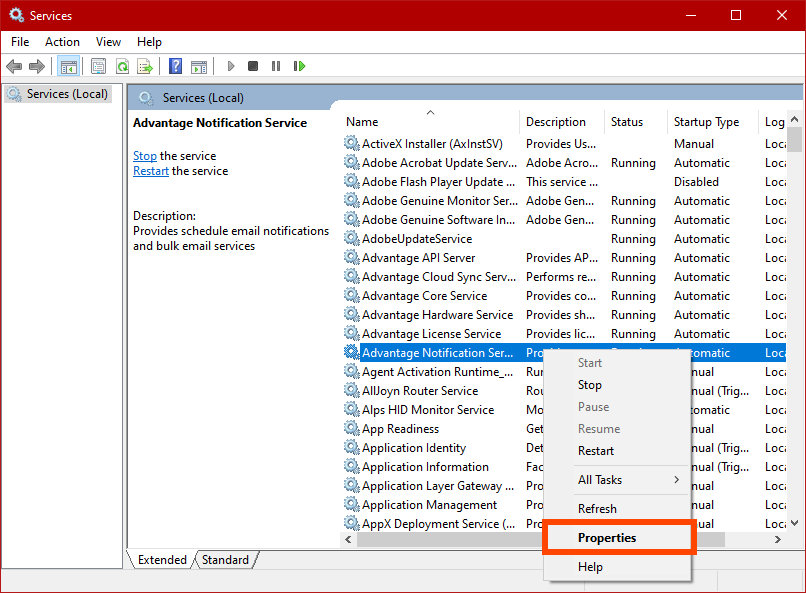
- Open Windows Services.
- Right click Advantage Notification Service.
- Click Properties.
- Open theLog Ontab.
- Select the radio button forThis account:.
- Enter a user account name.
- It is usually better to clickBrowseand search for valid account names.
- Enter the password for the selected user account in bothPassword:andConfirm Password:.
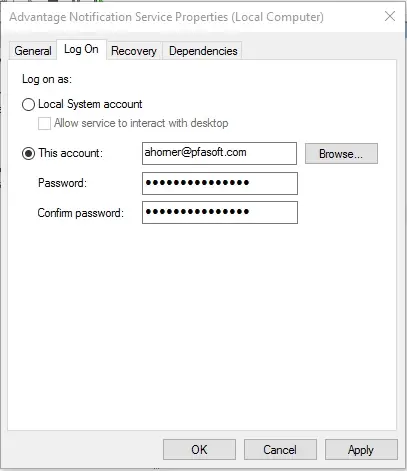
- ClickOKto save.
- Restart the service to load your new settings.
After making these changes, the Notification Service will now perform its programmed tasks as the selected user. Any reports that are generated by the service will use the default printer assigned for that user account. Be sure to send yourself a test notification to verify the reports are generated correctly.
- services.png
- worddavbdf009abe73d2e7572157b768ddf3e68.png
- worddava9ab9605e9d3c45aa10fe71016f3a575.png
- worddav6208489b56489069bdc1f626206106f8.png
- relative.png
- parameterbutton.png
- hourrepeats.png
- target.png
- testmessage.png
- reportnotification.png
- eventreviewed.png
- email template.png
- parameterstab.png
- confirmations.png
- targetlist.png
- addtarget.png
- distlist.png
- accounttype.png
- options.png
- Notifications Overview.mp4
- distribution.png
- select.png
- add.png
- events.png
- distmaint.png