Sites must enter a payment account and token group in the Admin Portal to process recurring payments for Advantage Membership renewals. A CenterEdge team member will note when it is required.
Add a New Account
- Login into the Admin Portal (https://mgmt.adv.centeredge.io/auth/login), click the gear icon at the top right, and select the location you will be updating.
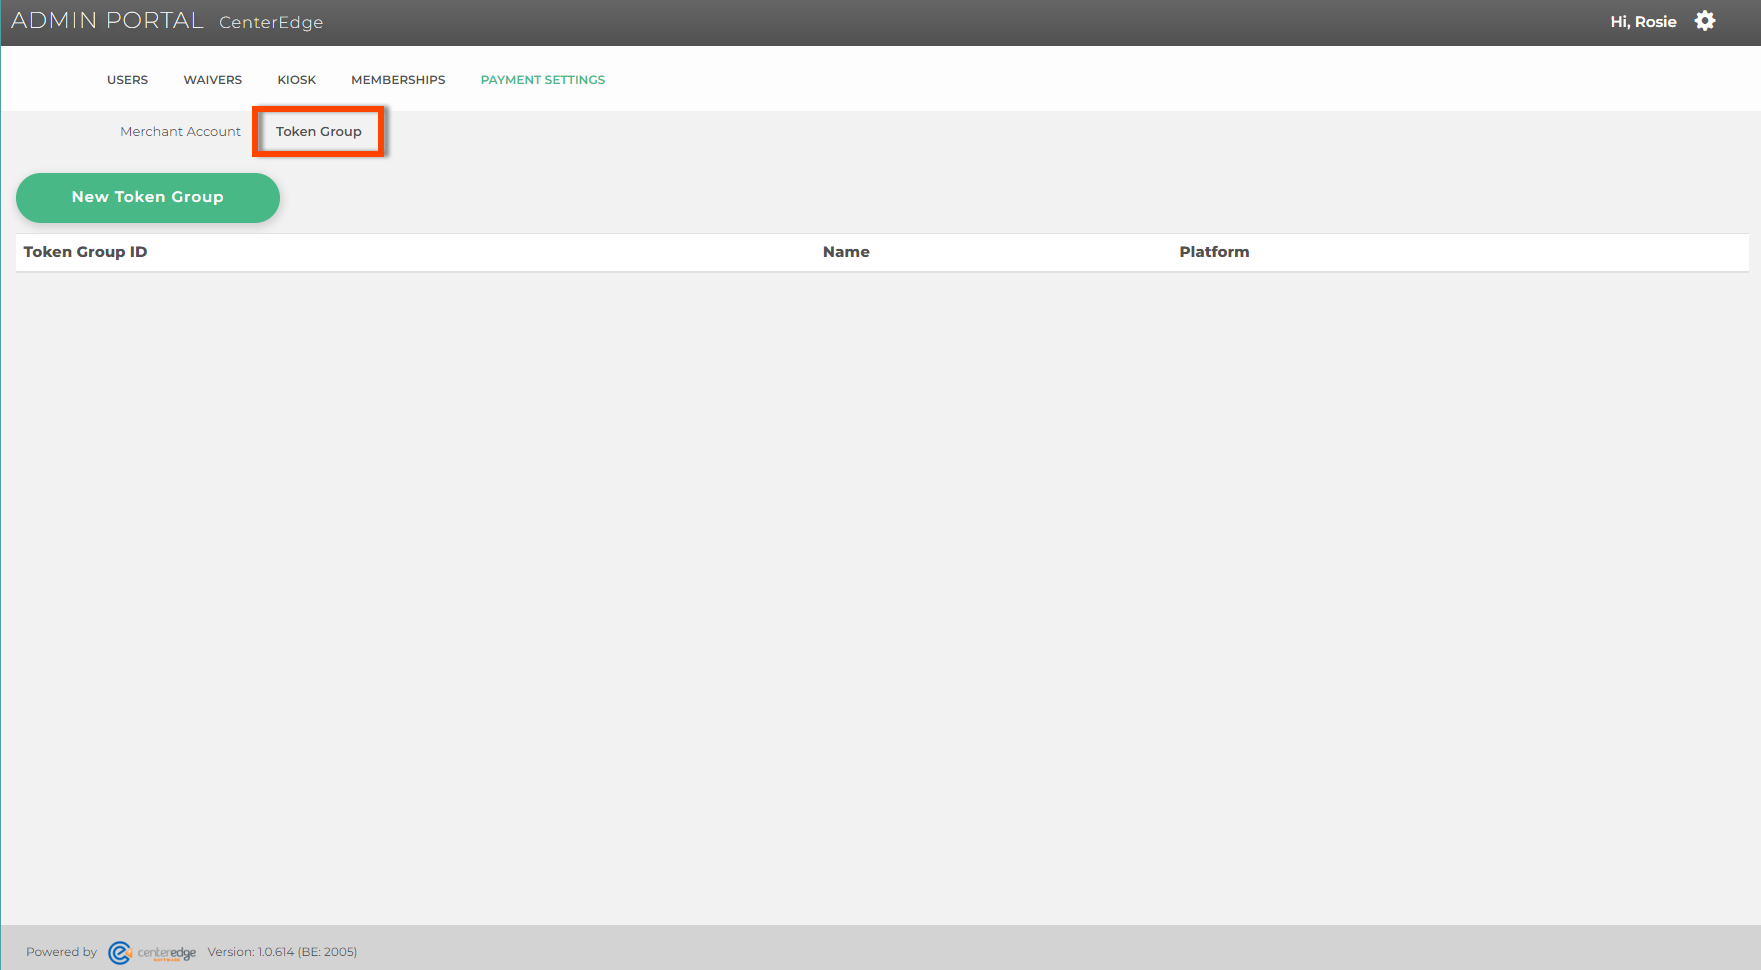
- Open the PAYMENTS SETTINGS tab.
- Click Token Group.
- Click New Token Group.
- If processing with CenterEdge Payments/NETePay Hosted, then name the token group 'DataCapHosted' and select DataCap Hosted as the Platform.
- If processing with Mercury EMV/Vantiv Hosted Checkout, then name the token group MercuryWP, and choose the Mercury/WorldPay as the Platform.
- Click Save.
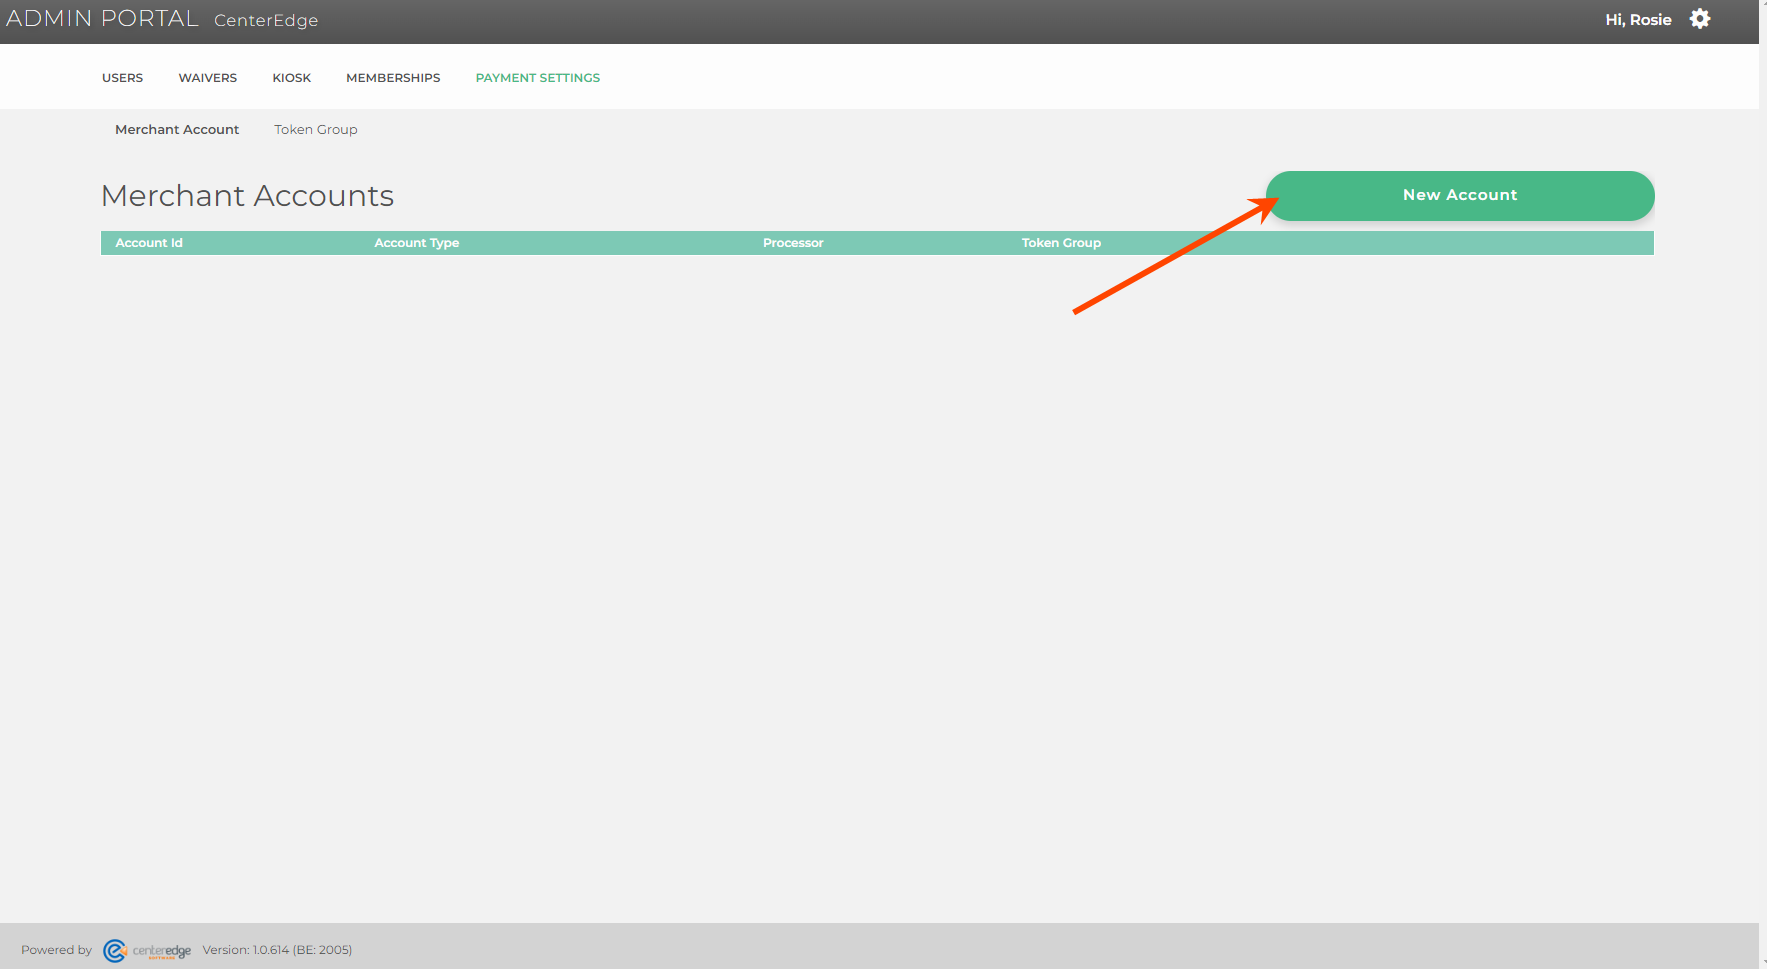
- In Payment Settings, Click Merchant Account.
- Click New Account.
- Select DataCapPayApi as the Processor Type.
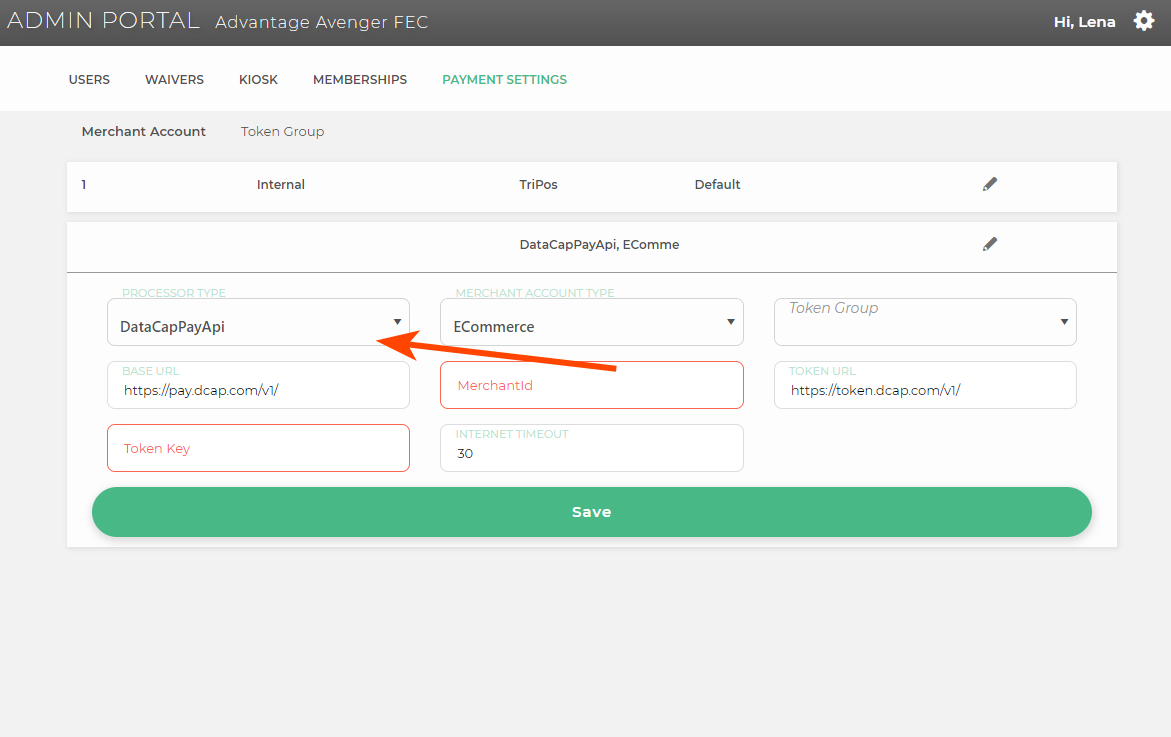
- Select ECommerce in the Merchant Account Type field.
- Enter the ECommerce Merchant Id and the E-commerce Token Key in their respective fields.
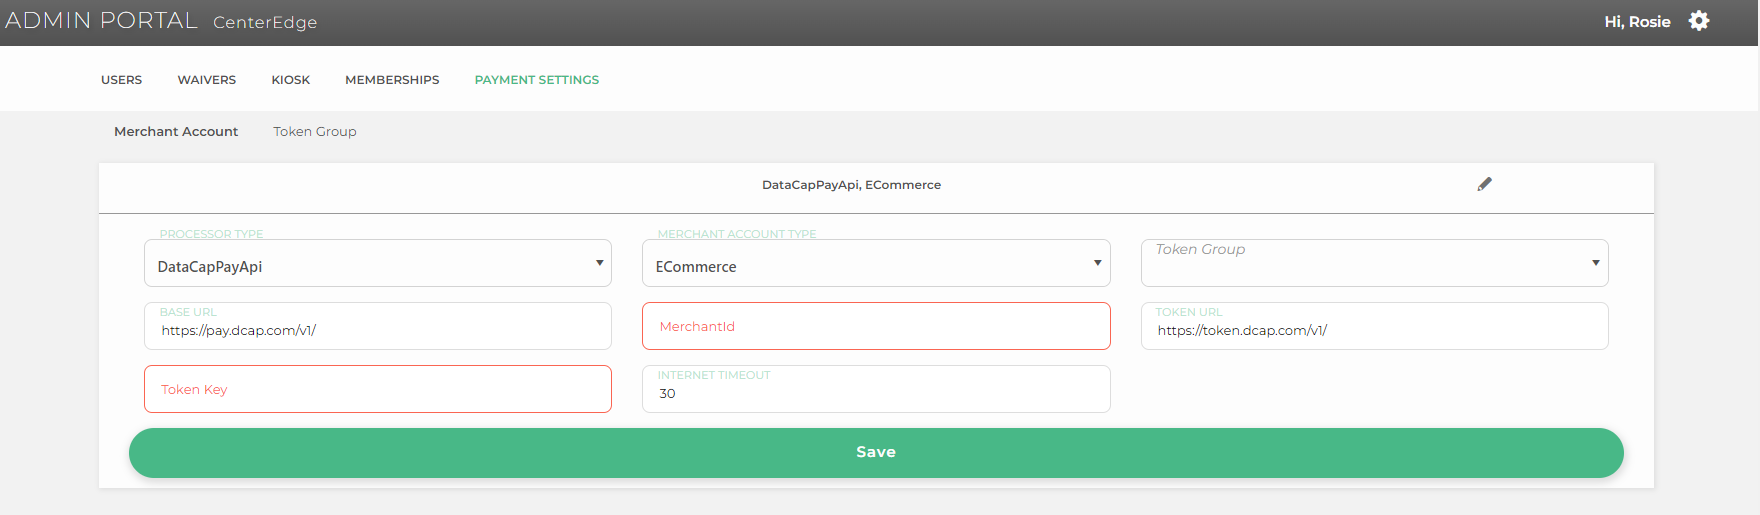
- Select the corresponding token group that was created previously.
- Click Save.
Mercury EMV/Vantiv Hosted Checkout Setup Before starting this process, please make sure you have the following handy.
- Merchant Account ID (E-Commerce MID if they have one, or you can use the Brick and Mortar MID)
- Call WorldPay at 800-846-4472 and ask to have Web Services enabled on the MID you will be using; this will ensure that the old tokens will work.
- Generate a Web Services password in the IQ portal. Use the copy to clipboard function to prevent mistakes between the letter O and the number 0 etc. If you have to have someone generate the password for you, have them copy to clipboard and either email or slack it to the technician doing the process.
- Select Mercury WS as the Processor Type.
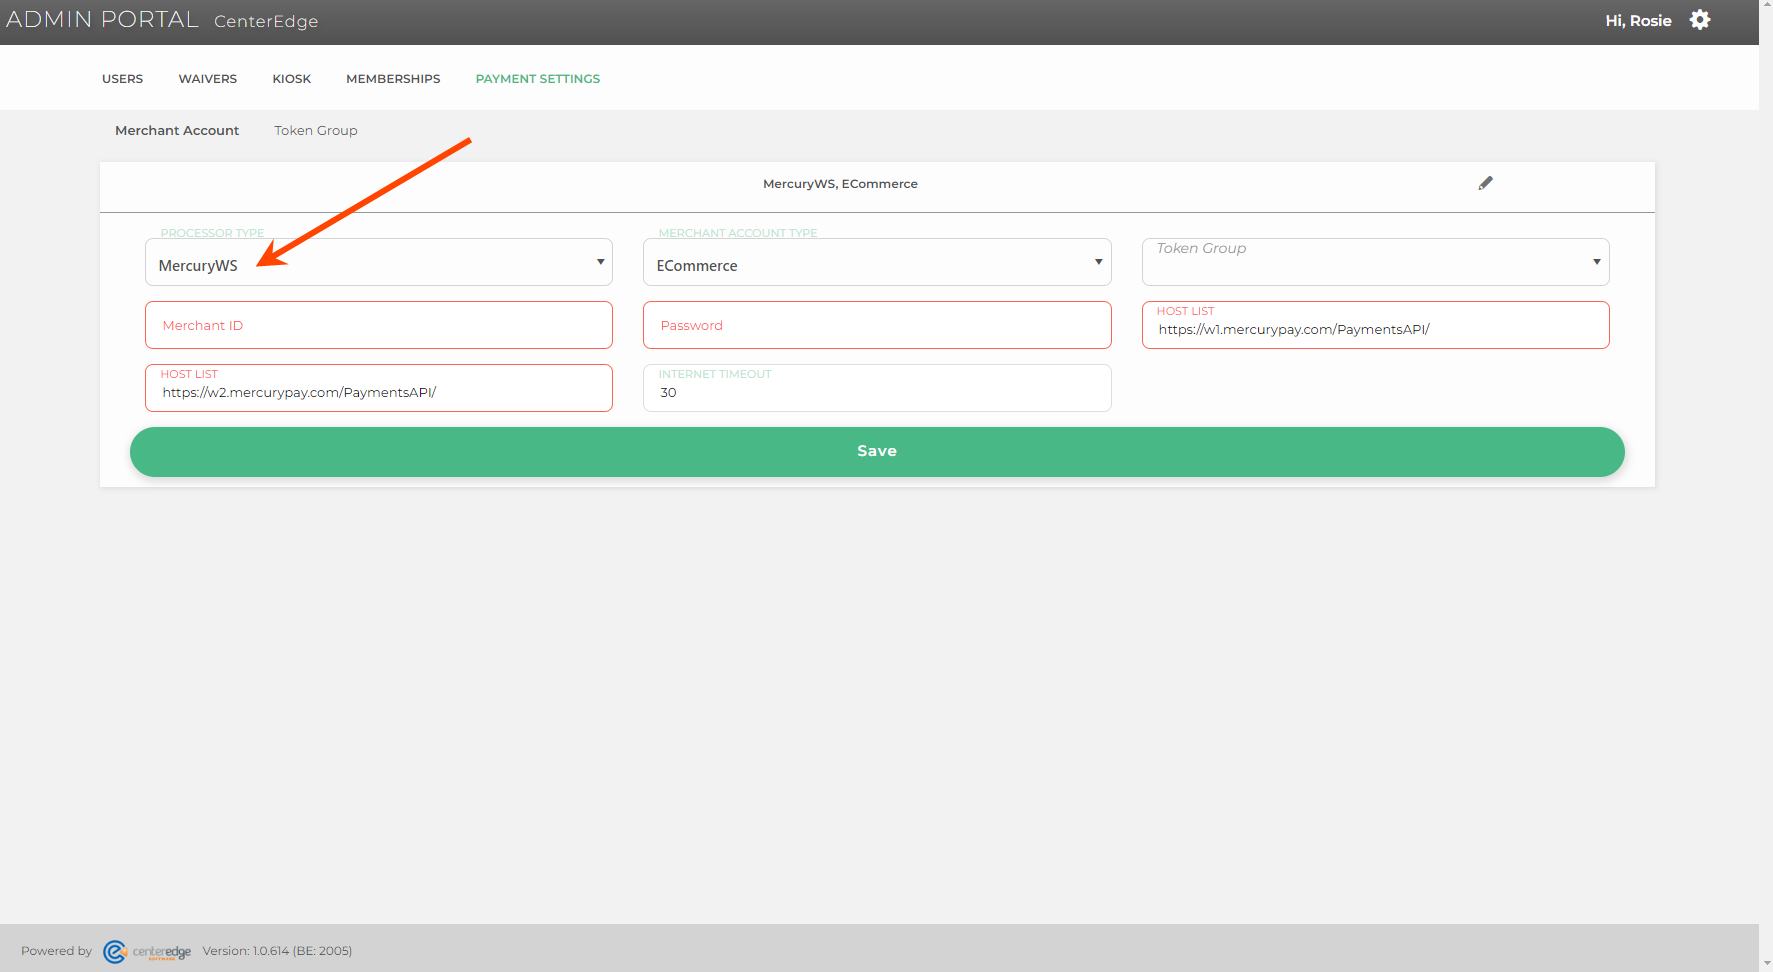
- Select ECommerce in the Merchant Account Type field. (This is just a flag, you don't have to use the Ecommerce MID if the site doesn't already have one.)
- Enter the Merchant ID and Web Services Password into the corresponding fields.
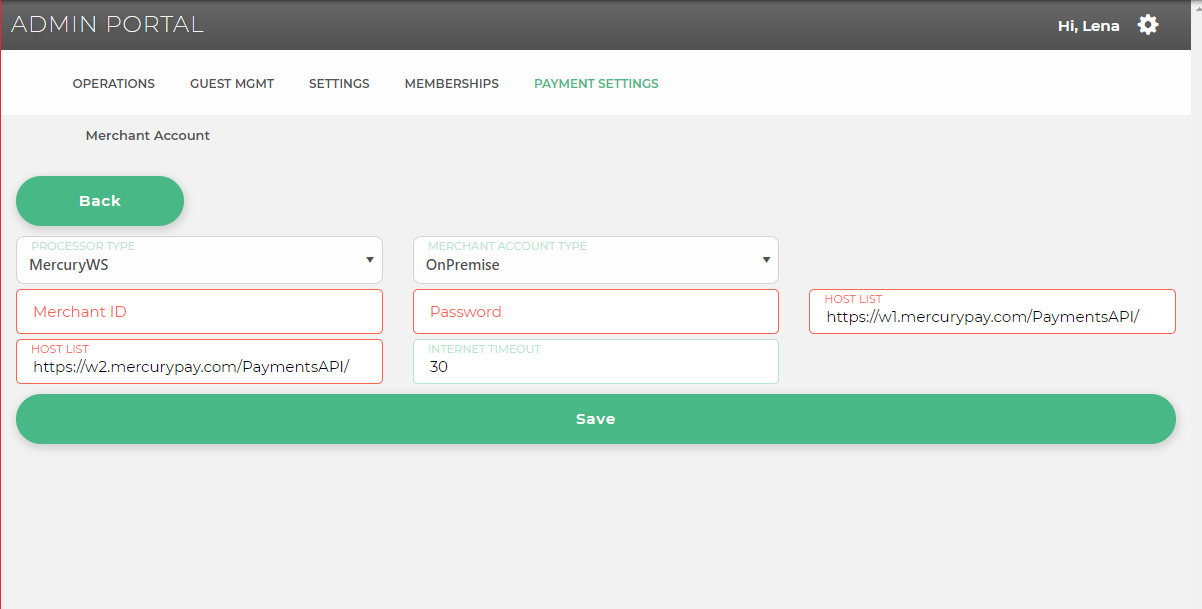
- Select the corresponding token group that was created previously.
- Click Save.