Areas are a means in Advantage to represent your site's spaces and/or attractions and manage their schedules, participant capacity, and other details.
Accessing Areas
Manager Console
- From Manager Console, click Maintenance.
- Double-click Capacity.
- Double-click Areas.
- Select an Area to modify from the Select Area pull-down.
Groups
- From Groups, click Setup.
- Click Areas.
- Select an Area to modify from the Select Area pull-down.
Creating an Area
- From Manager Console, click Maintenance.
- Double-click Capacity.
- Double-click Areas.
- Click Add.
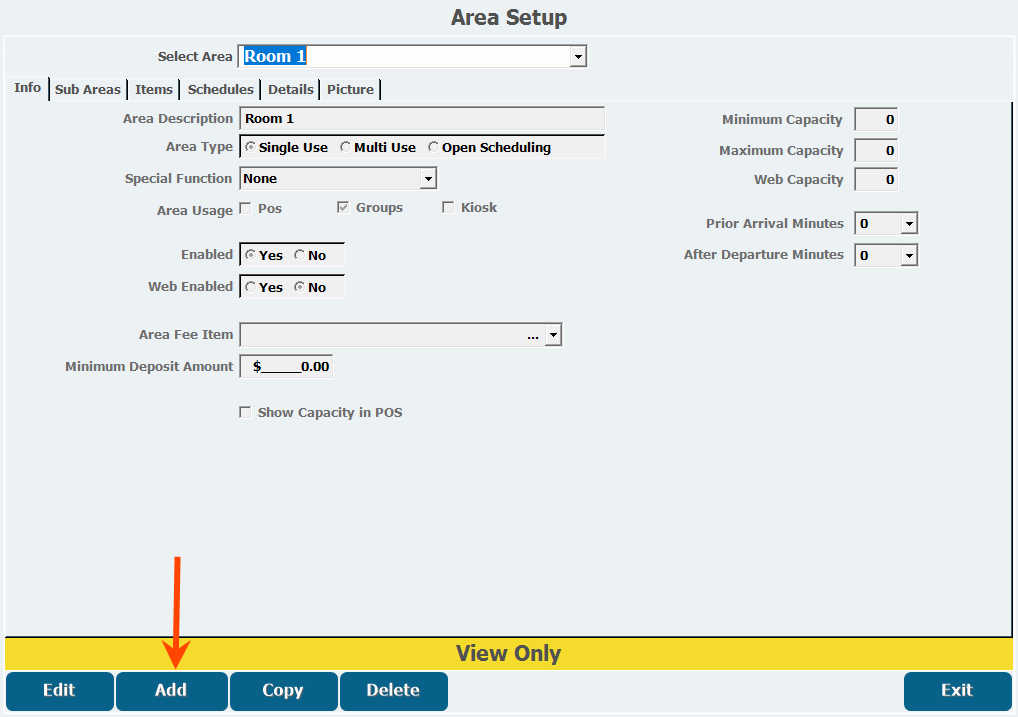
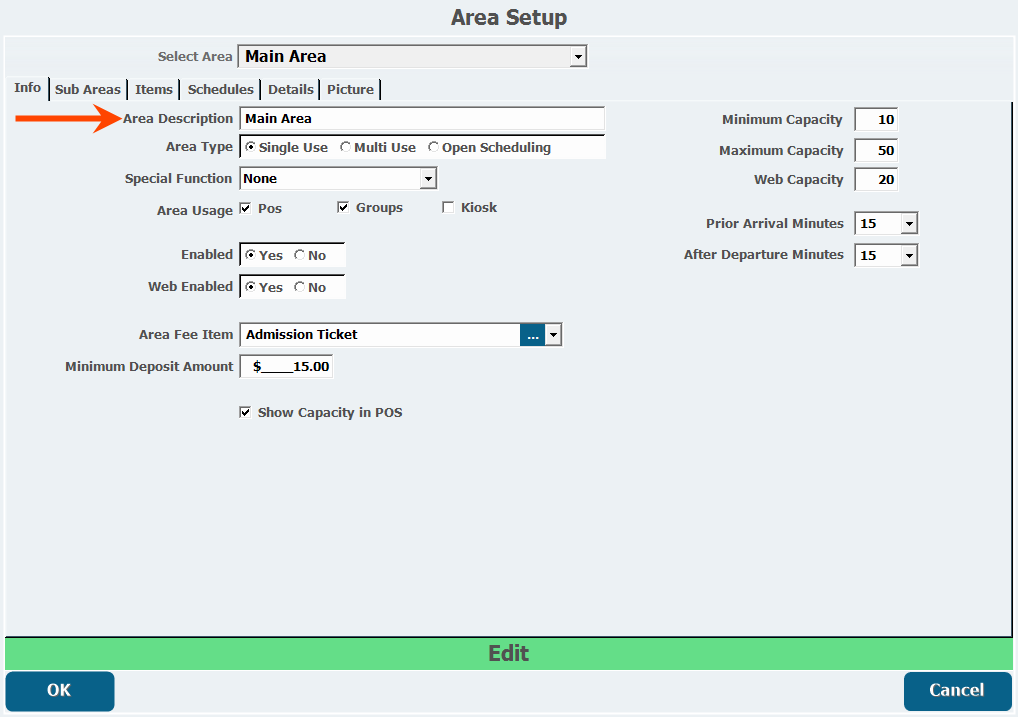
- Enter a Description.
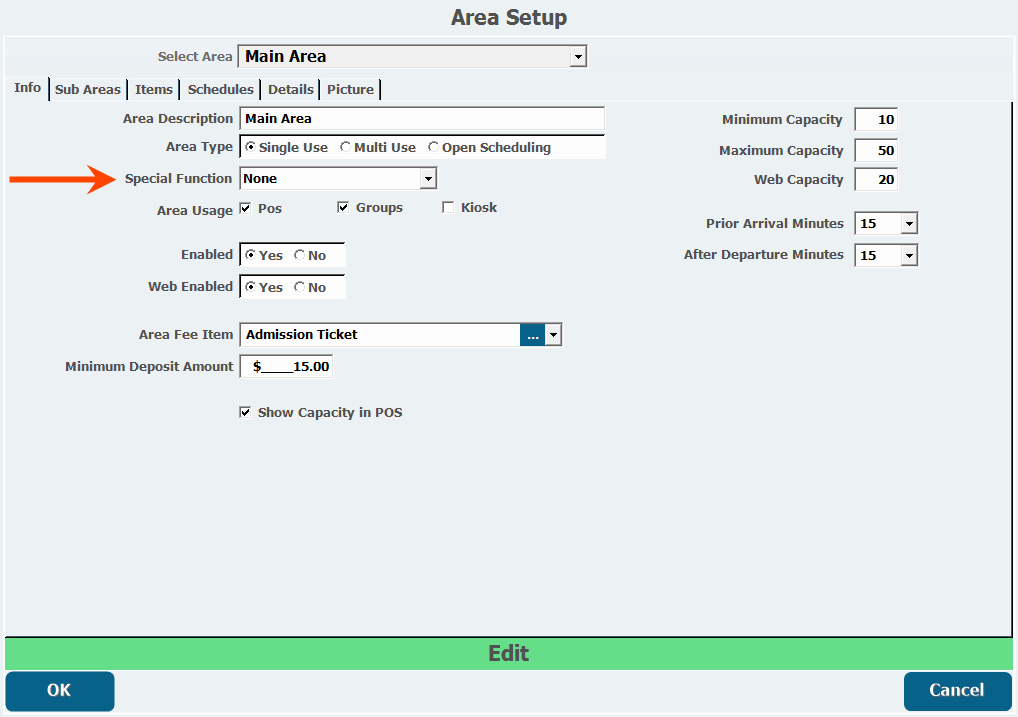
- Select an Area Type.
- Single Use can only be used by one group at a time.
- Multi Use allows more than one person to book into an area.
- Open Scheduling allows the area to be used without defined time blocks.
- An area setup with open scheduling cannot be booked online.

- An area setup with open scheduling cannot be booked online.
- Select a Special Function, if the area requires specific equipment such as Laser Tag or Go Karts.
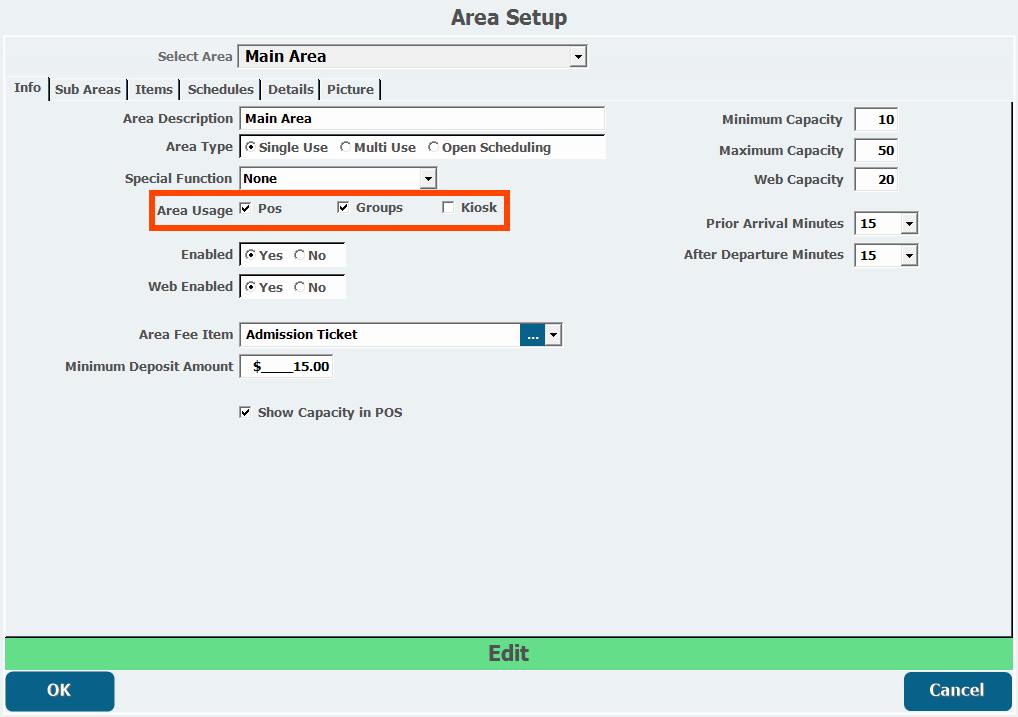
- Select an Area Usage.
- This determines how the area can be accessed through POS, Groups, or Advantage Kiosk . These can be selected in any combination of the 3 options or none at all.
- This determines how the area can be accessed through POS, Groups, or Advantage Kiosk . These can be selected in any combination of the 3 options or none at all.
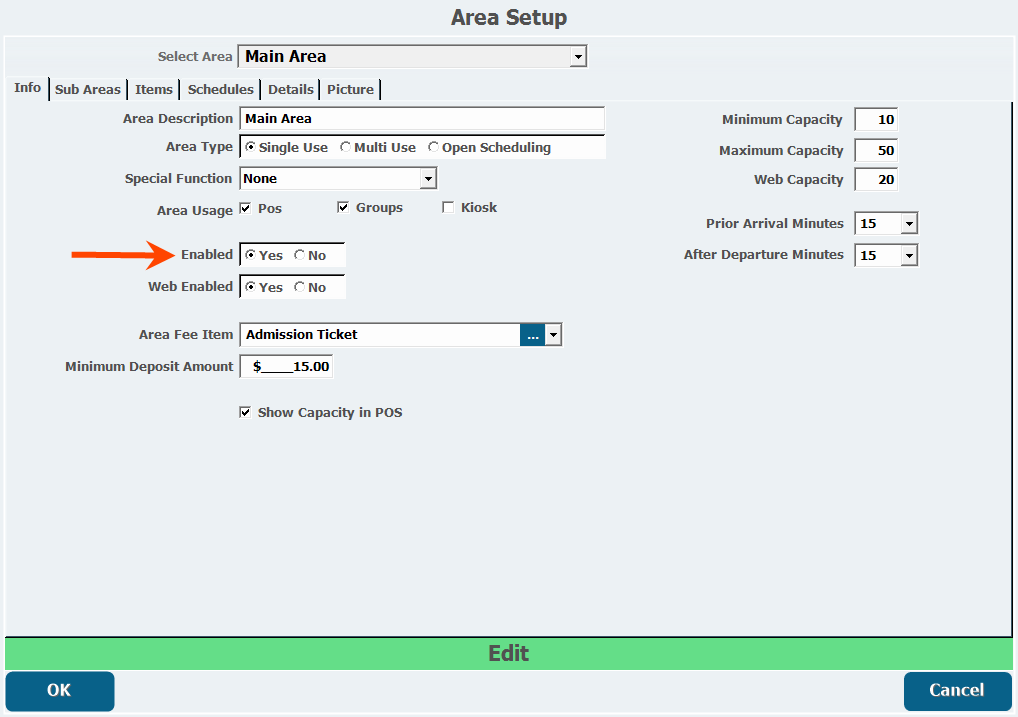
- Select Enabled if the area is available for booking.
- Select if the area is Web Enabled. If the area has open scheduling it cannot be sold online.
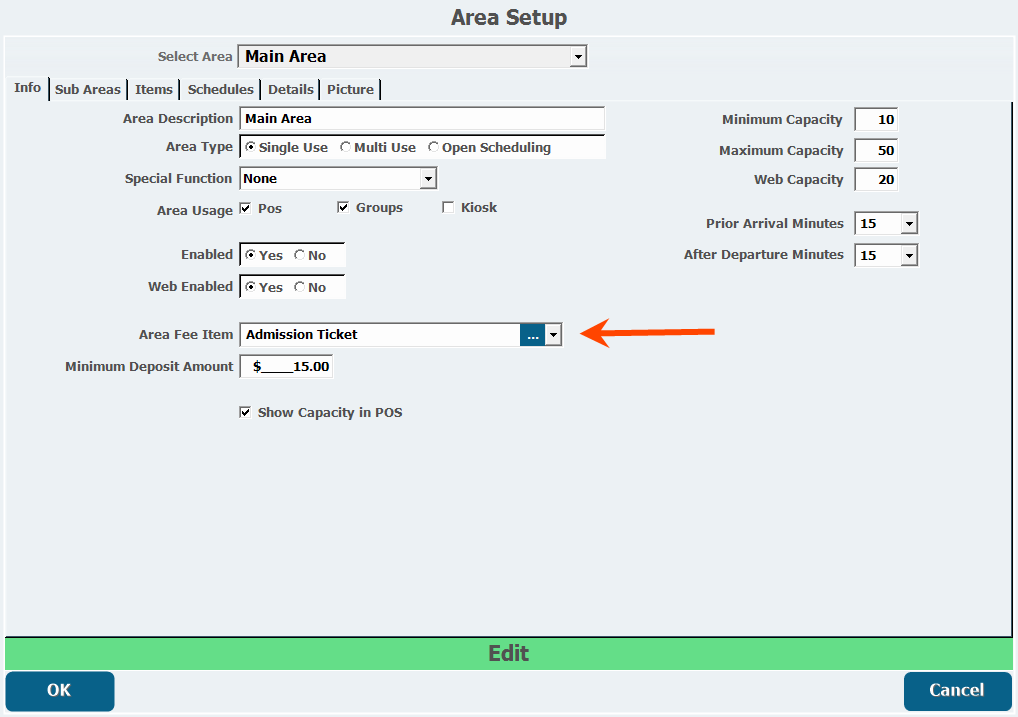
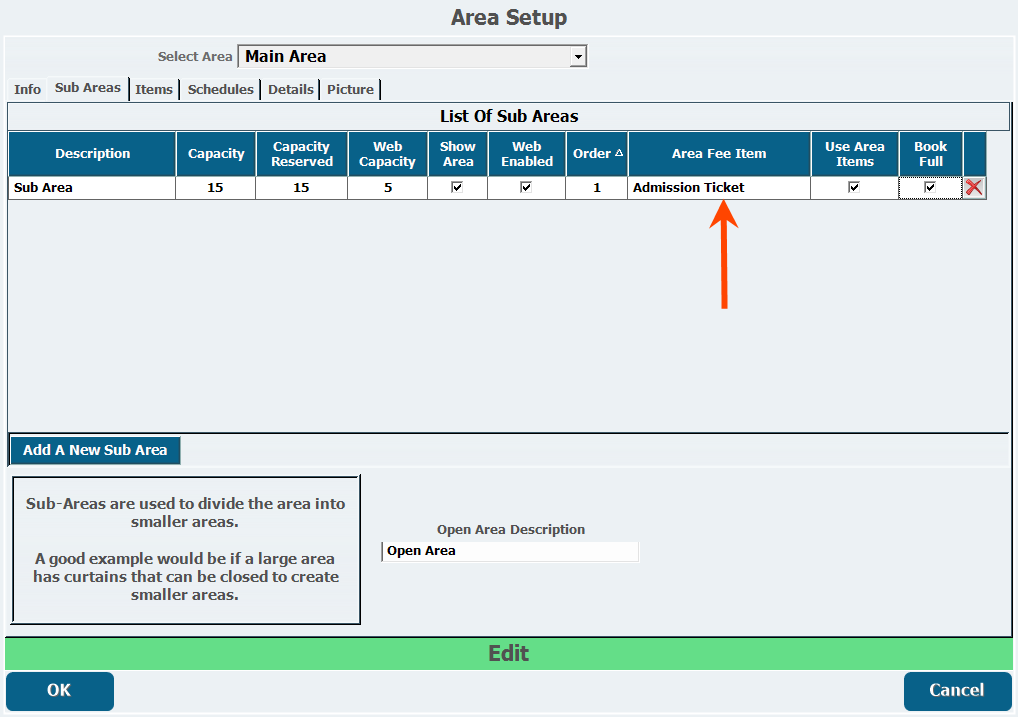
- Choose an Area Fee Item, if applicable to this area.
- This is an optional inventory item representing the price of a fee to be automatically added anytime the area is booked. New items must be added through Item Maintenance before they can be selected.
- This is an optional inventory item representing the price of a fee to be automatically added anytime the area is booked. New items must be added through Item Maintenance before they can be selected.
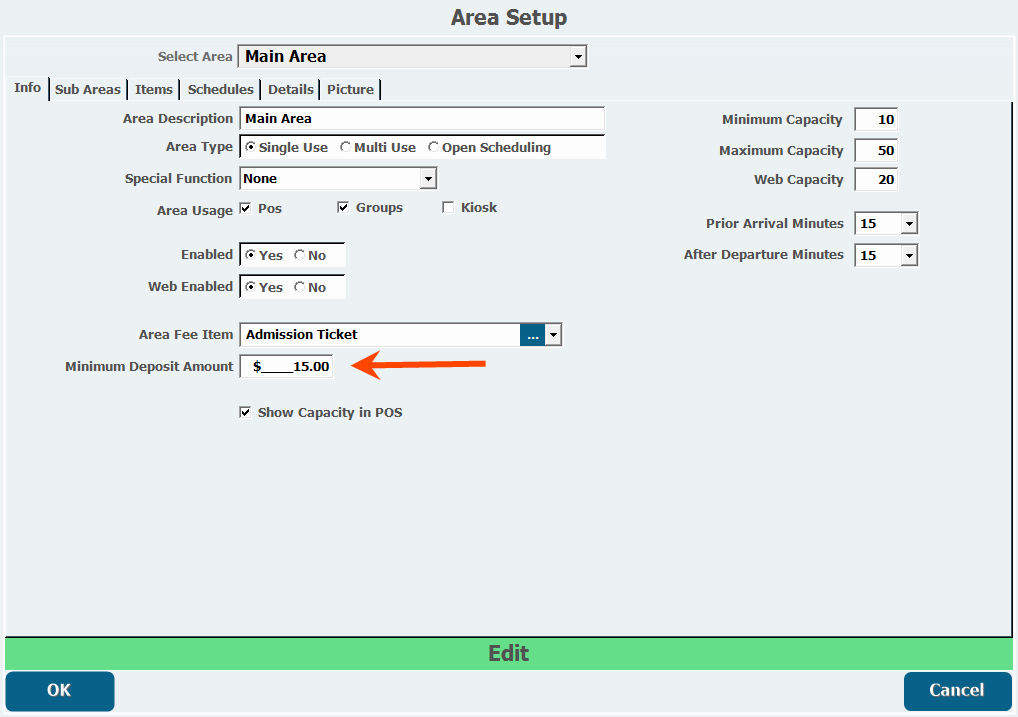
- Enter a Minimum Deposit Amount.
- This amount can override the minimum deposit for an event and is only applicable for reservations made online through the Web Store.
- This amount can override the minimum deposit for an event and is only applicable for reservations made online through the Web Store.
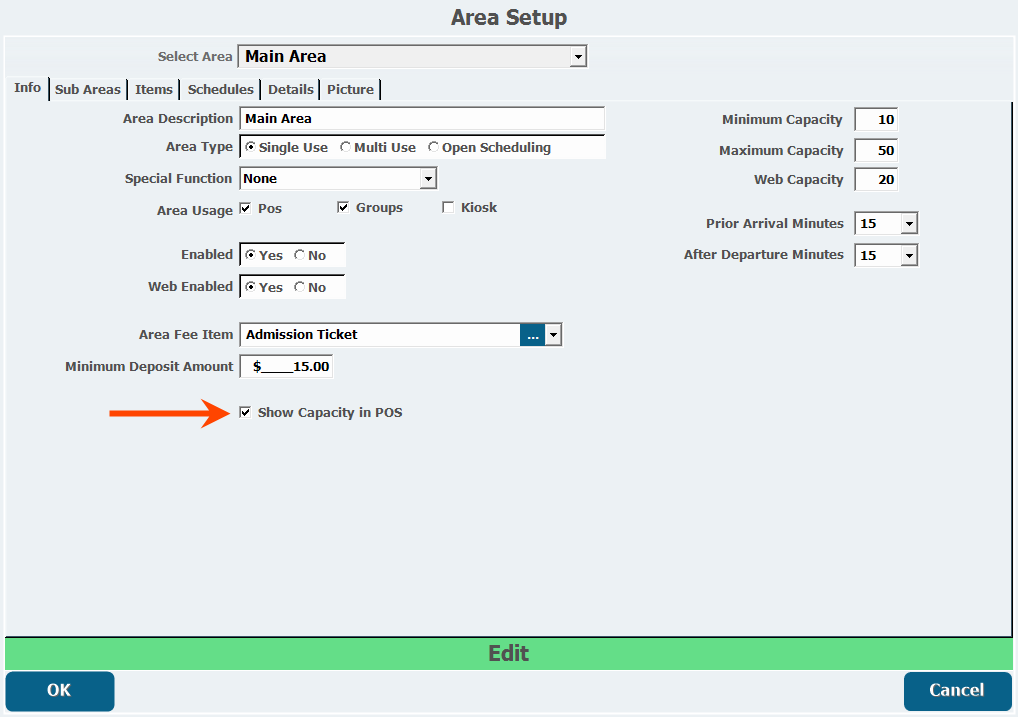
- Select Show Capacity in POS to display the area capacity in POS.
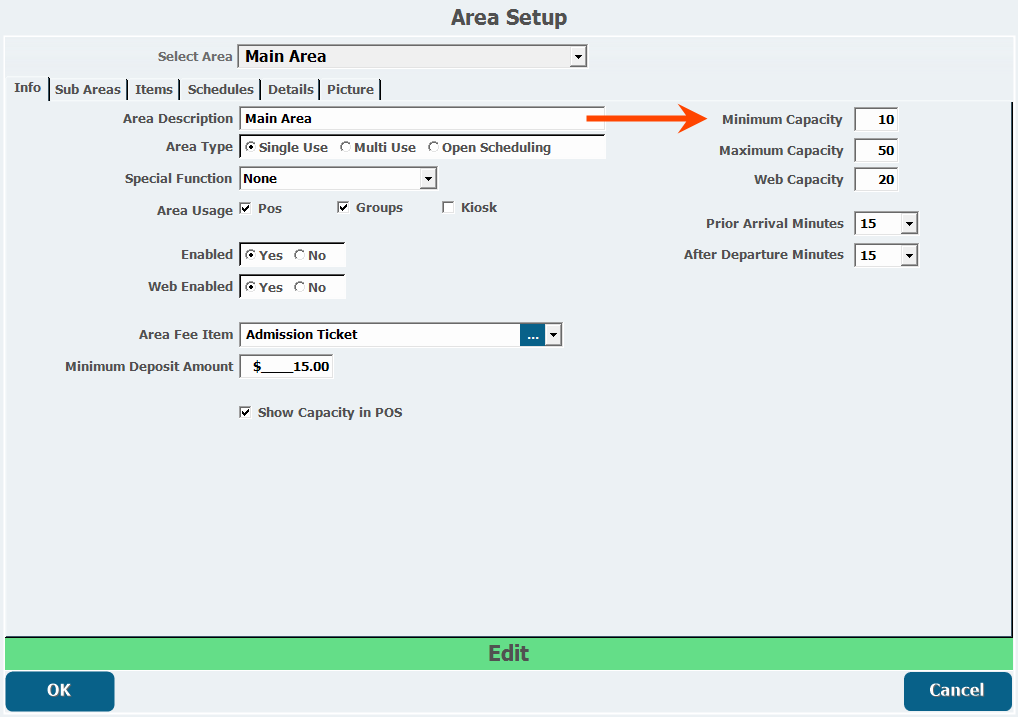
- Enter a Minimum Capacity, which means the area can't be booked if fewer than that number of people are booking.
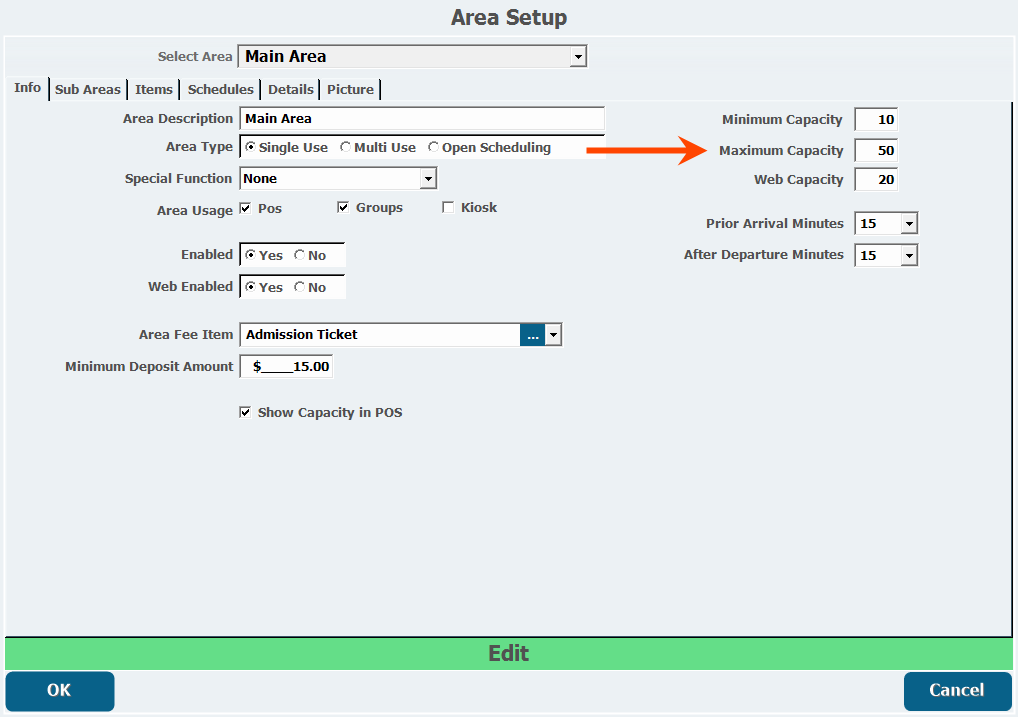
- Enter a Maximum Capacity for the area/attraction.
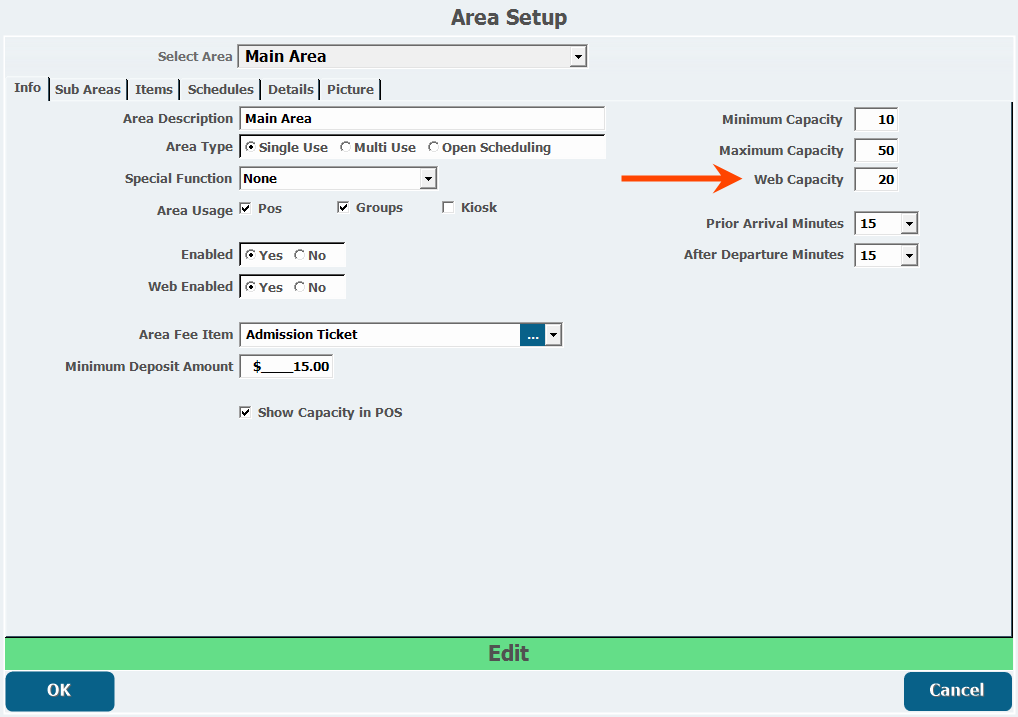
- Enter a Web Capacity to limit the amount of reservations that can be booked via the web.
- Select the Prior Arrival Minutes.
- This is how long before the reservation a group is expected to arrive.
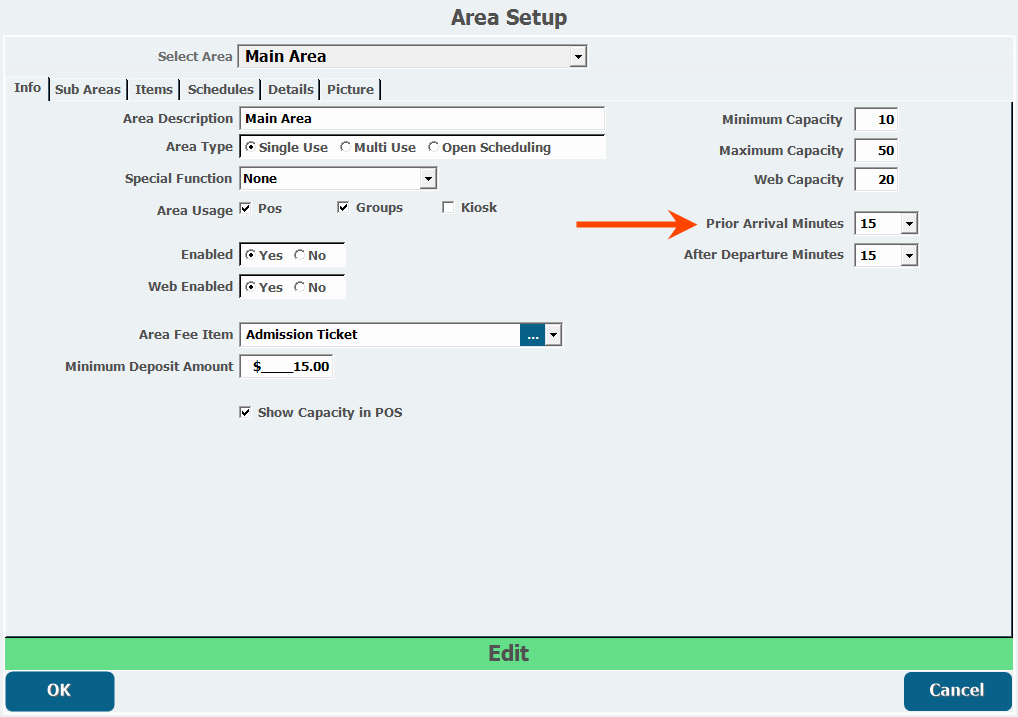
- This is how long before the reservation a group is expected to arrive.
- Select the After Departure Minutes.
- This is an optional period of time you can specify as a buffer for something like cleanup after a party.
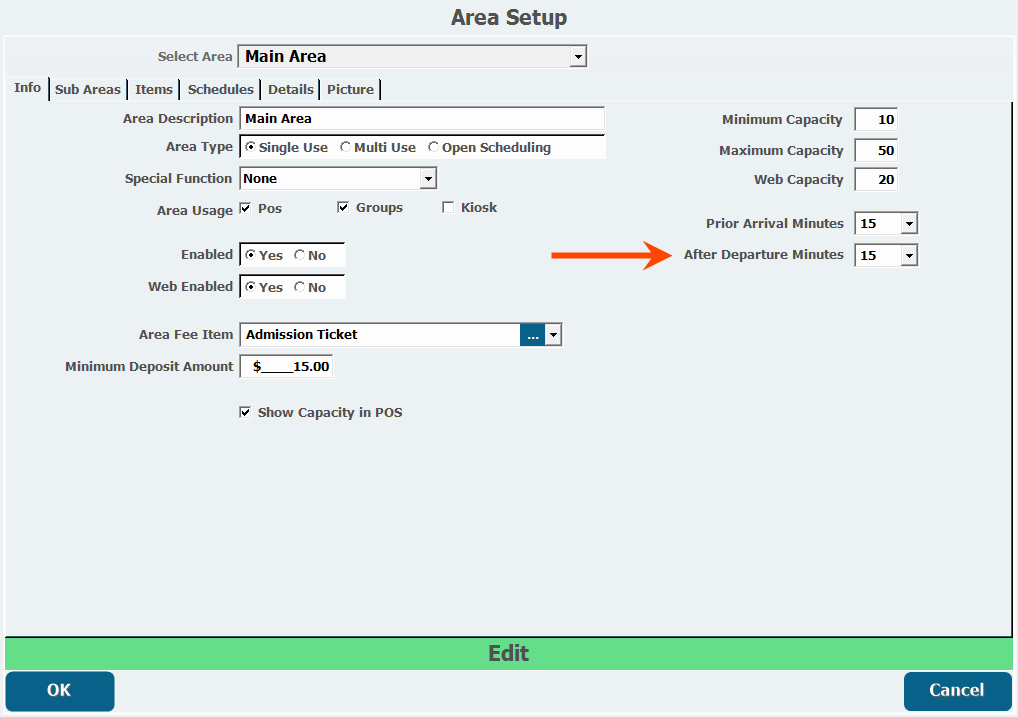
- This is an optional period of time you can specify as a buffer for something like cleanup after a party.
- Configure the following tabs as necessary.
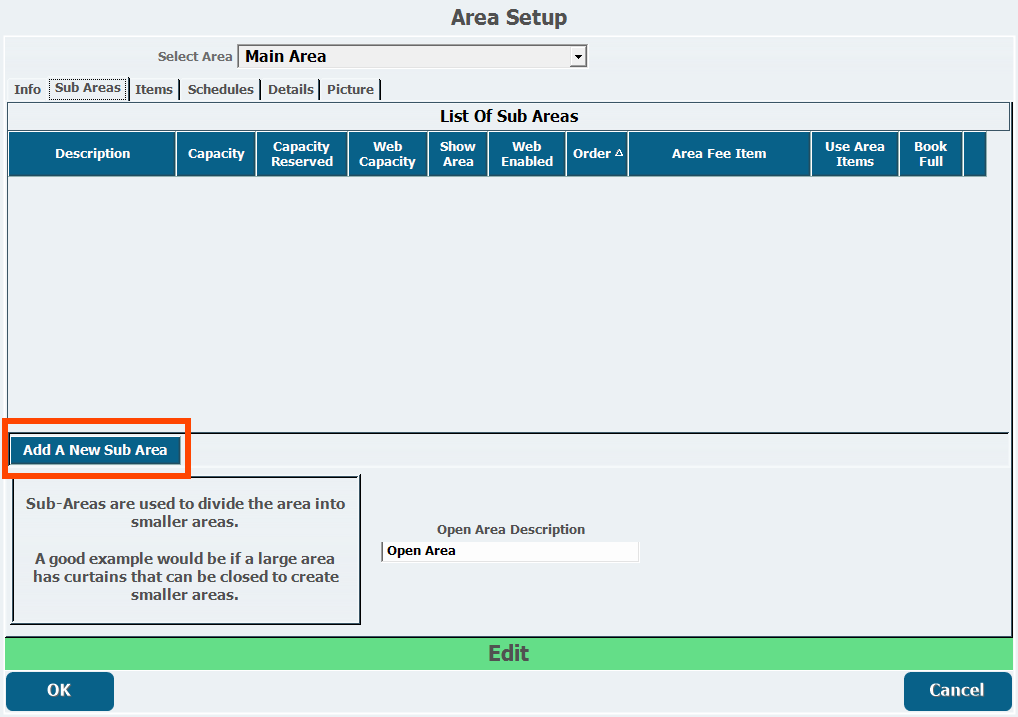
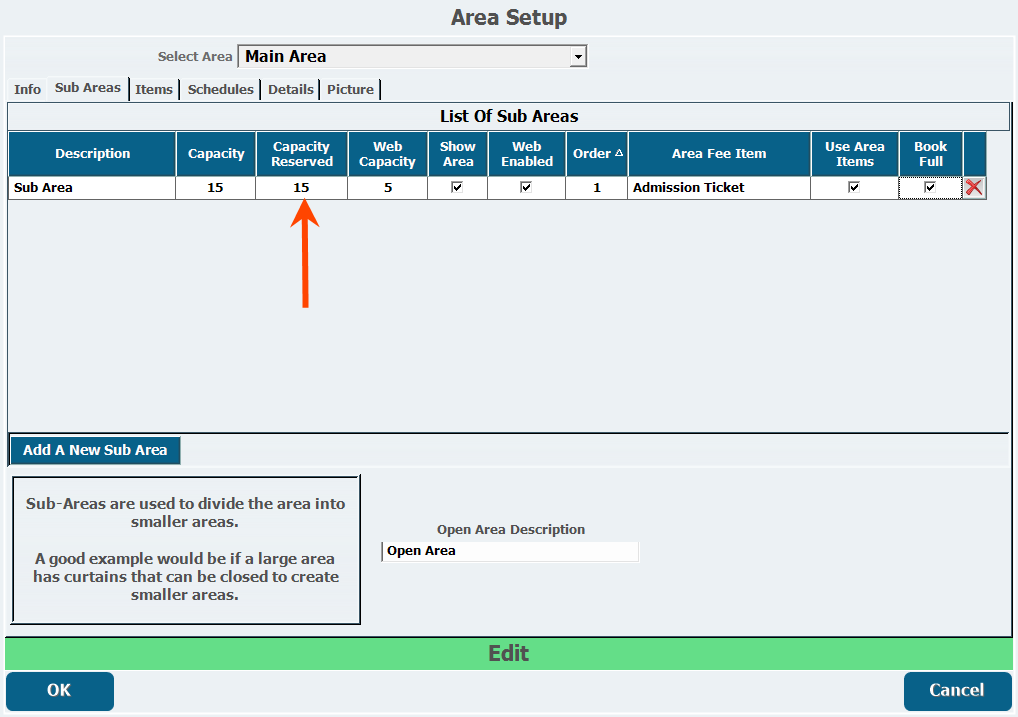
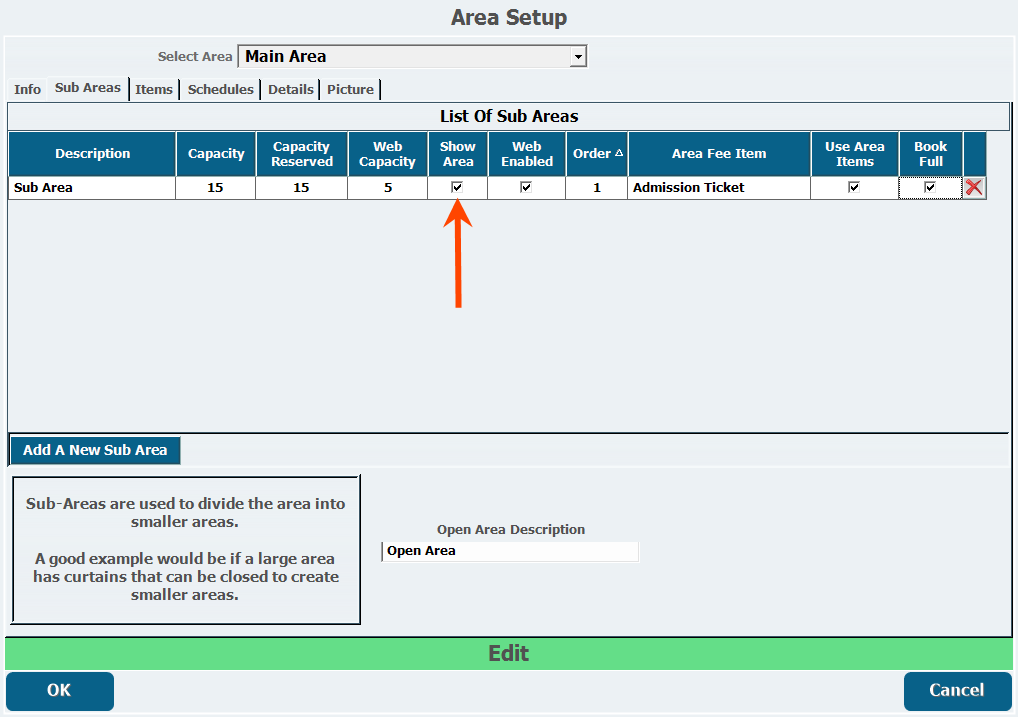
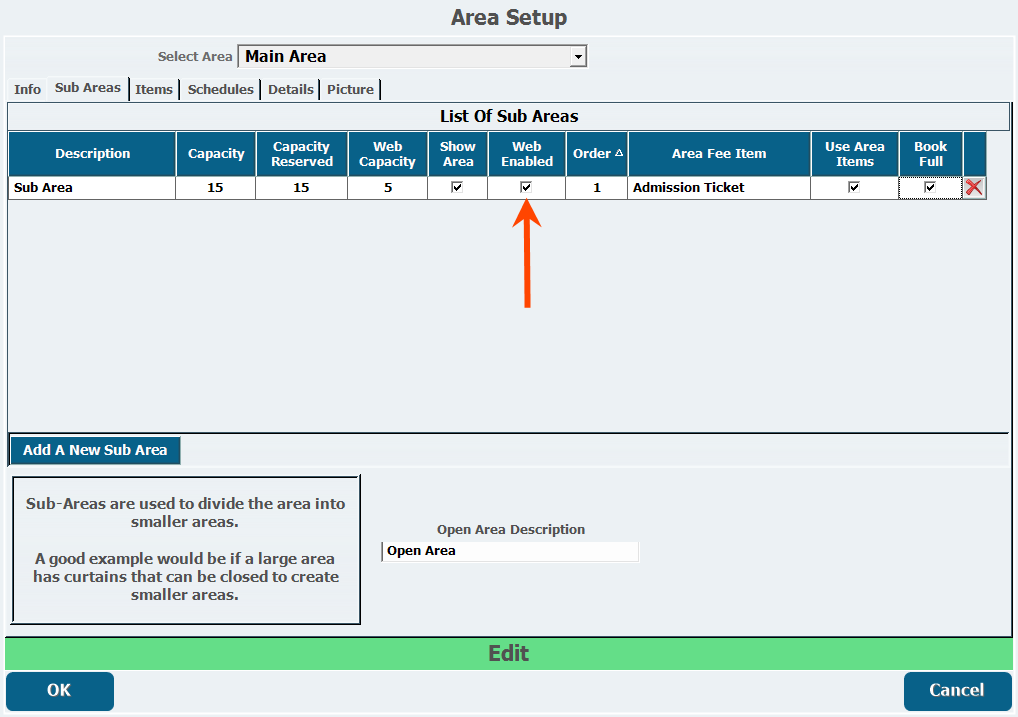
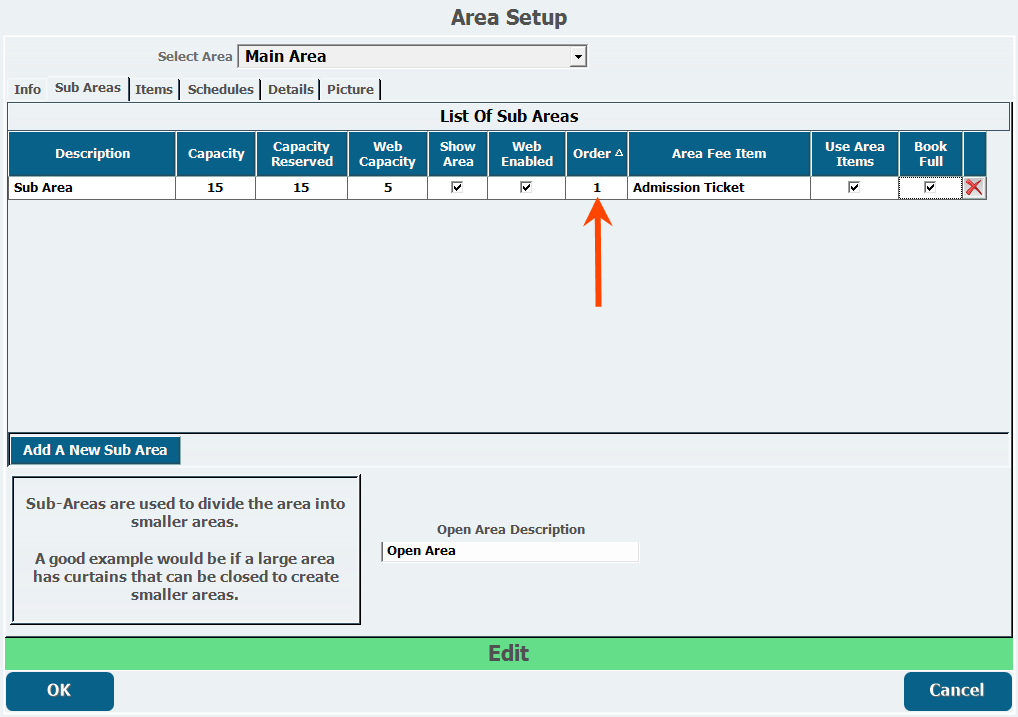
Sub Areas
Sub Areas
Sub Areas are sections your Area can be divided into, such as in situations where a curtain or divider can be drawn across a room to split it in half or into other smaller sections.
- From the Sub Area tab in Area Setup, click Add A New Sub Area.
- Enter a Description.
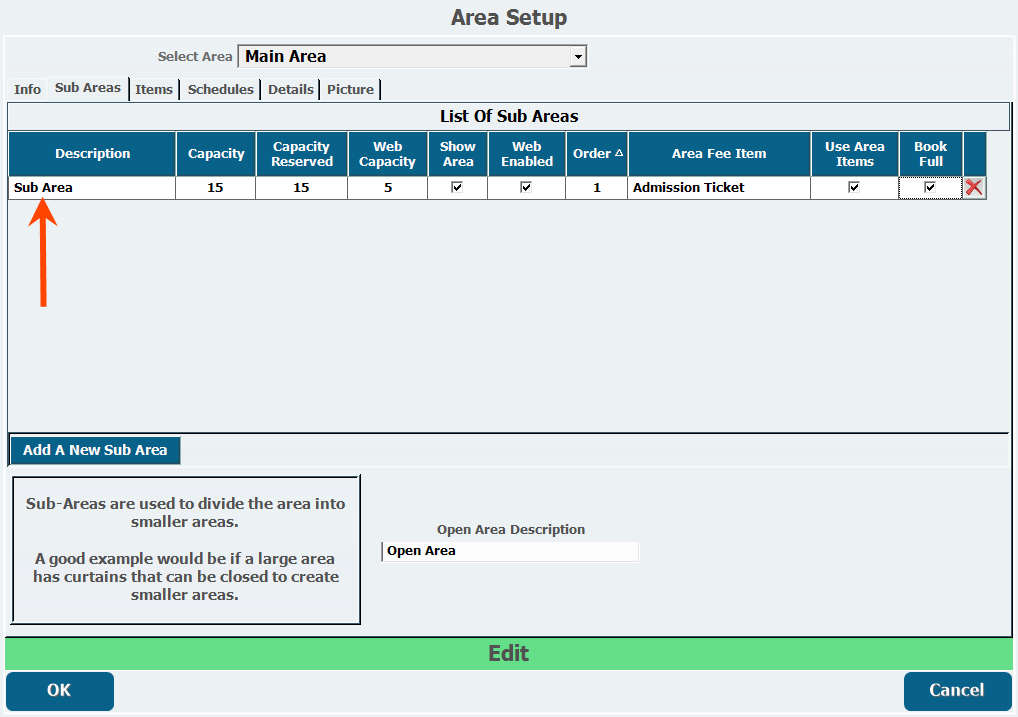
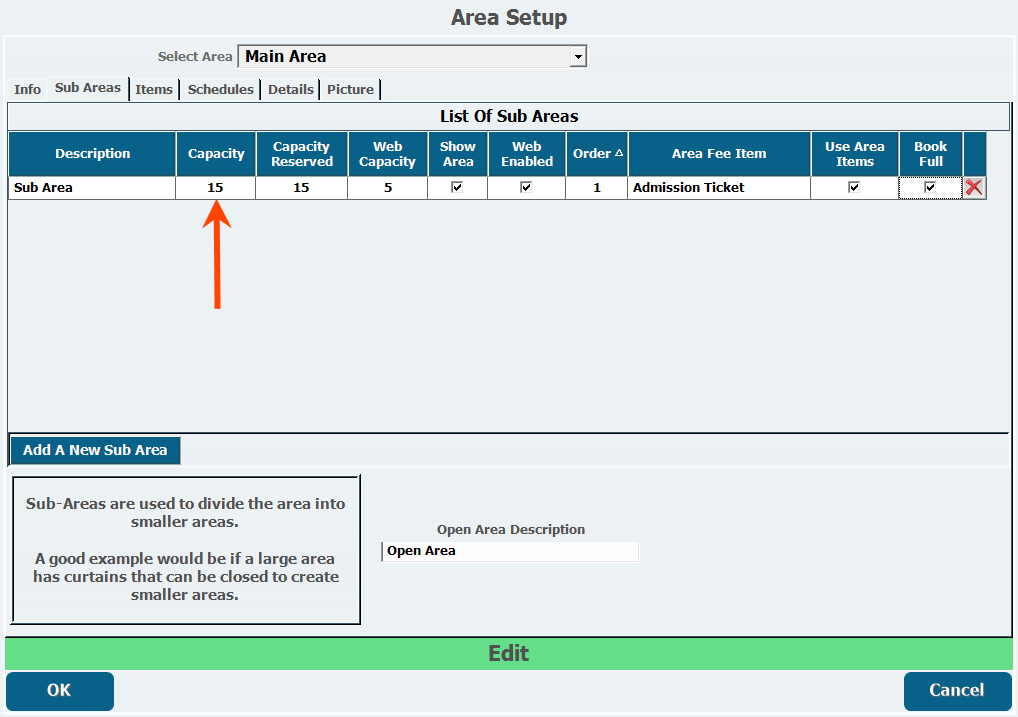
- Enter a Capacity.
- Enter a Capacity Reserved, which is the amount that will be taken out of the capacity of the main area when this sub area is reserved.
- Enter a Web Capacity to limit the capacity that can be reserved online if necessary.

- Select Show Area if this sub area will appear as a unique area.
- Select Web Enabled to allow web purchases.
- Enter an Order
- This will determine the order that the sub areas appear in online.
- This will determine the order that the sub areas appear in online.
- Choose an Area Item Fee if this sub area will have an additional fee to book into, which will be added to any fee for the main area.
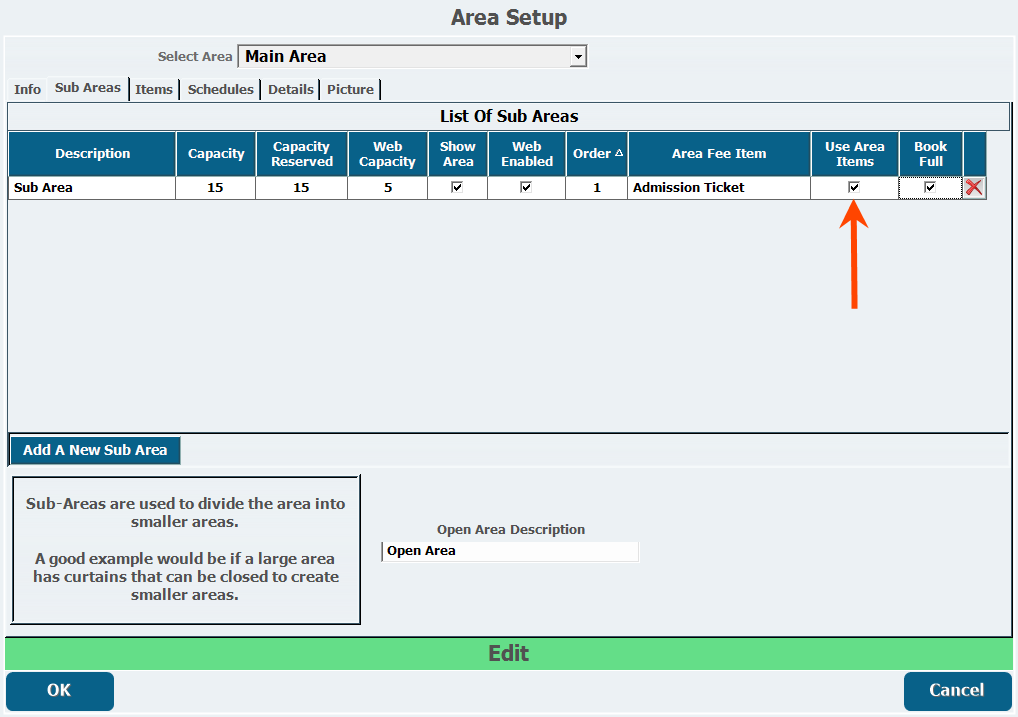
- Select Use Area Items if this sub area will use the items from the Items tab for the main area.
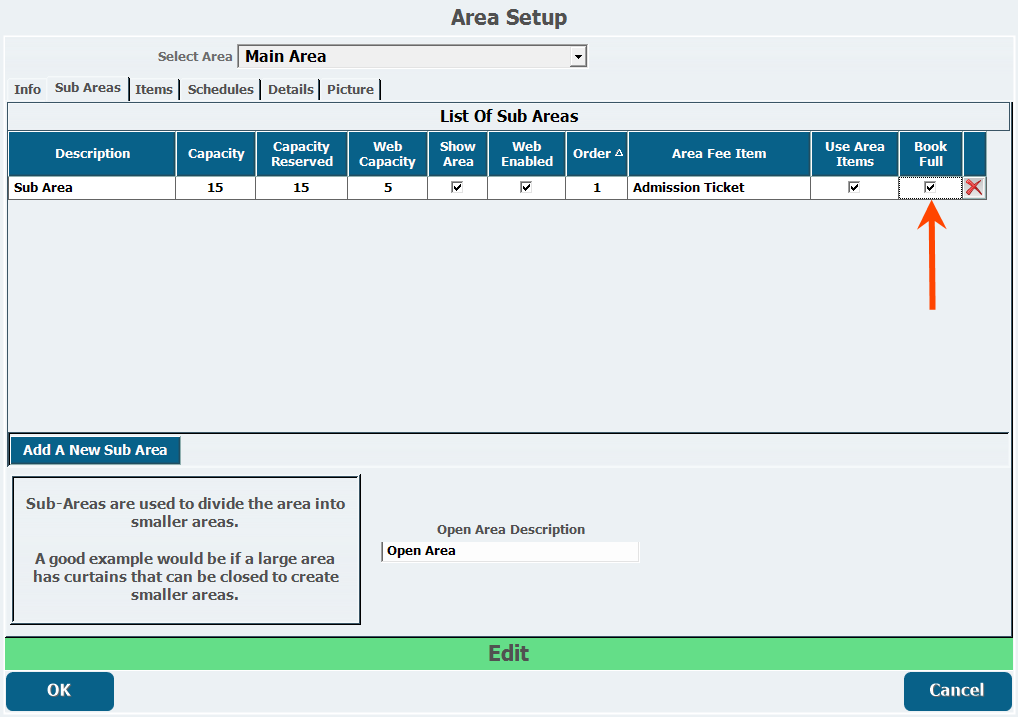
- Select Book Full to only reserve the area when maximum capacity is reached.
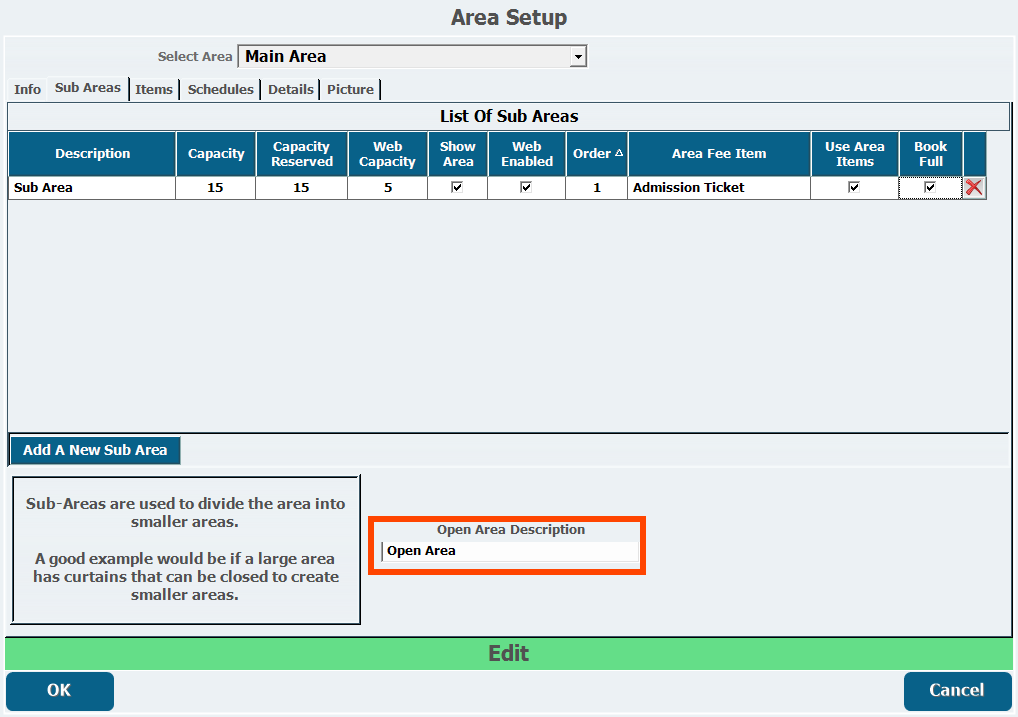
- Enter an Open Area Description if necessary.
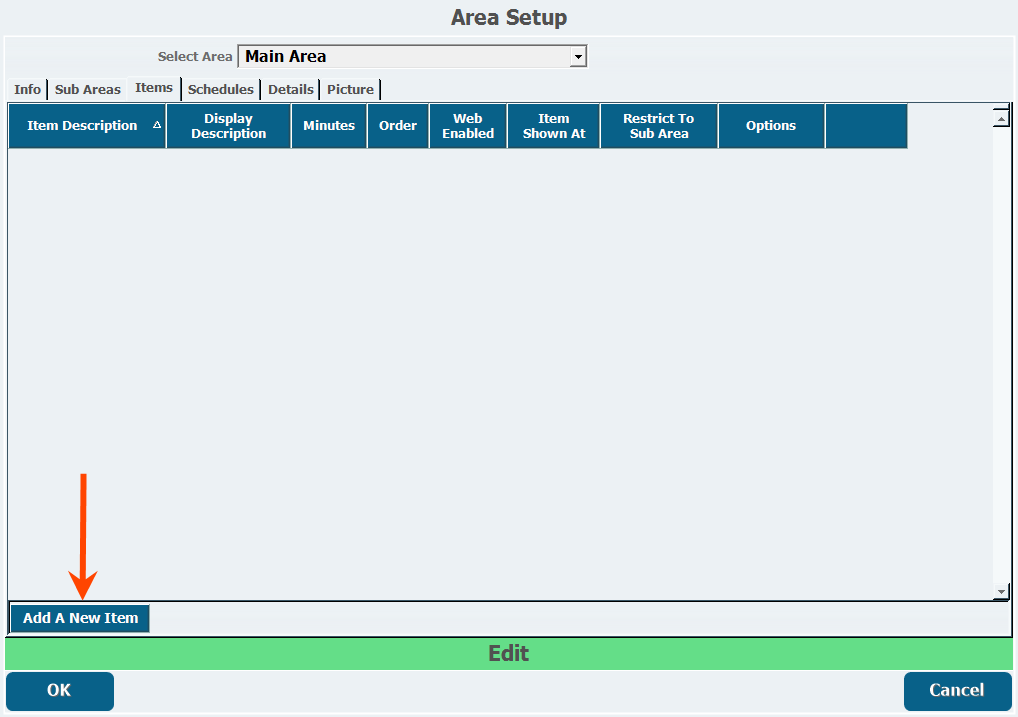
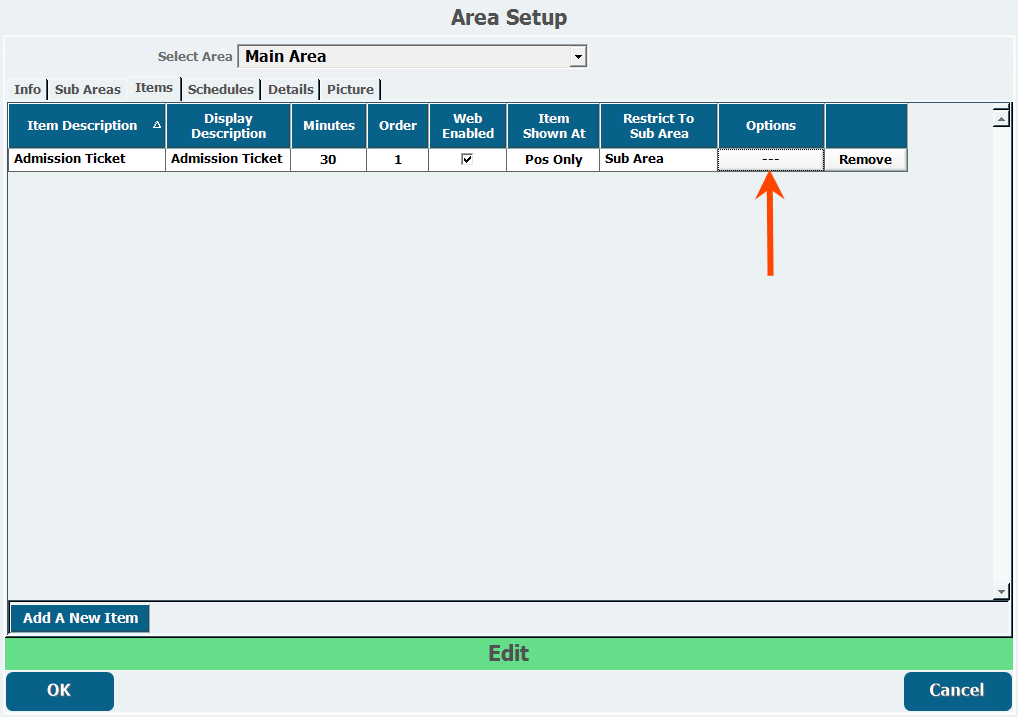
Items
Items
The Items tab lets you add inventory items to an area to be available for reservation, such as a 60 minute jump ticket for a trampoline park or a 90 minute child admission to an obstacle course area.
- From the Items tab in Area Setup, click Add A New Item.
- Select the item from the Item Description pull-down.
- You must have already created these items in Item Maintenance.
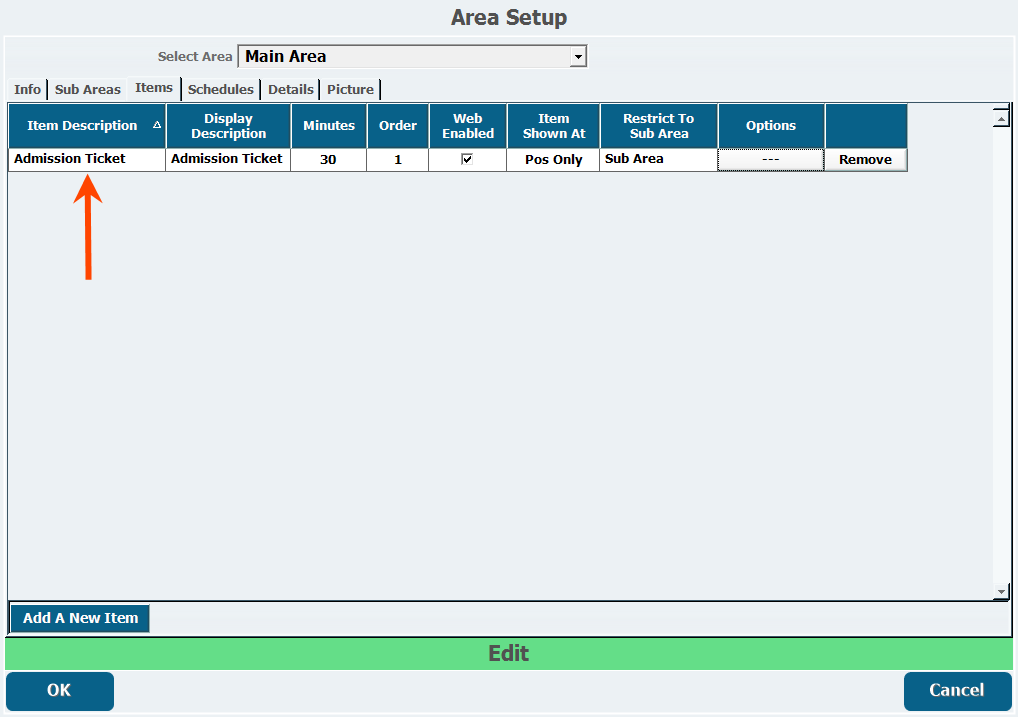
- You must have already created these items in Item Maintenance.
- Enter a Display Description, which is the description that customers will see when they purchase this item.

- Enter the number of Minutes this item will reflect a reduction in capacity, beginning at the time for which the ticked was reserved.
- For example, entering 30 here would cause the available capacity of this area to be reduced for 30 minutes following the start time this item is booked for.

- For example, entering 30 here would cause the available capacity of this area to be reduced for 30 minutes following the start time this item is booked for.
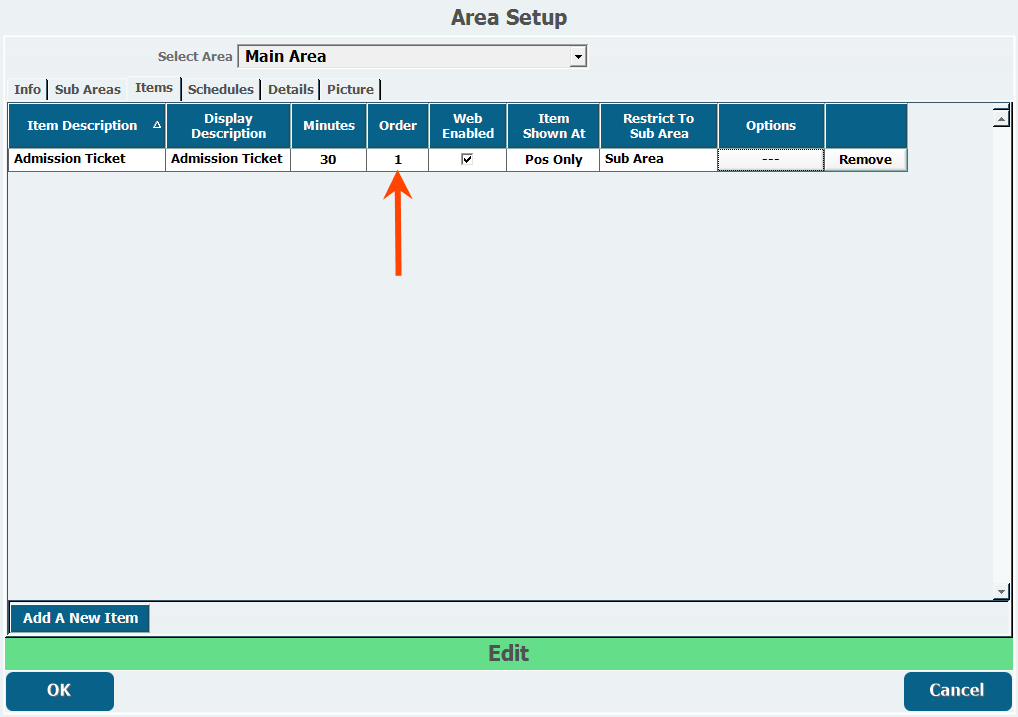
- Enter the Order in which this item will appear.
- Select Web Enabled to enable the item on the web.

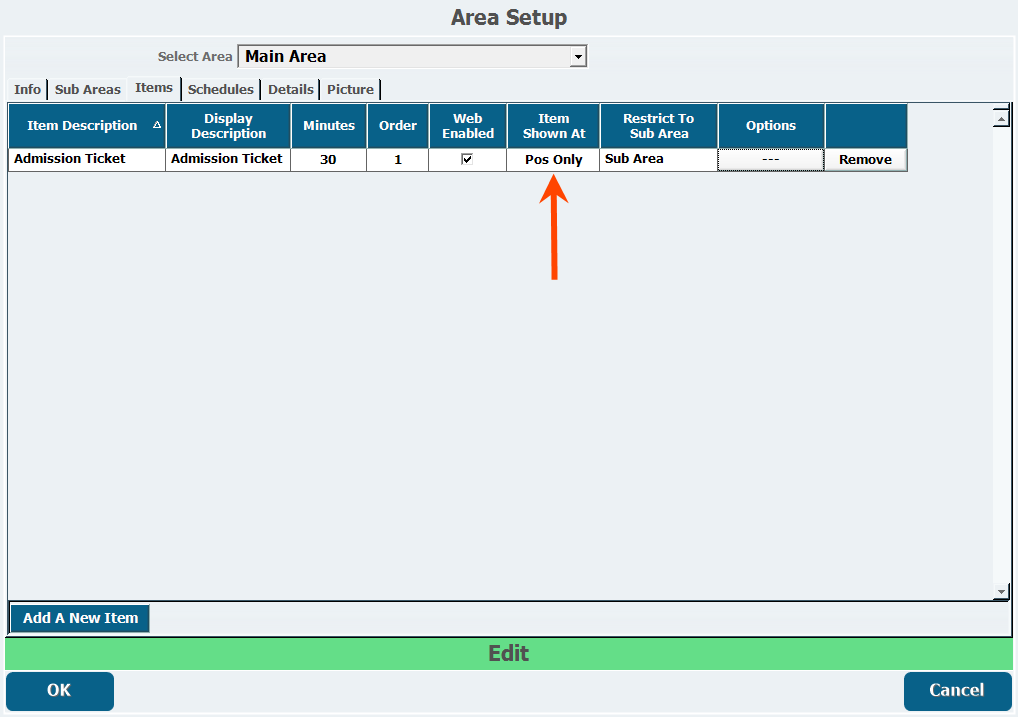
- Select an application from the Item Shown At pull-down to determine where the item is available.
- Select a sub area from Restrict To Sub Area if this item will only be purchasable in a specific sub area.

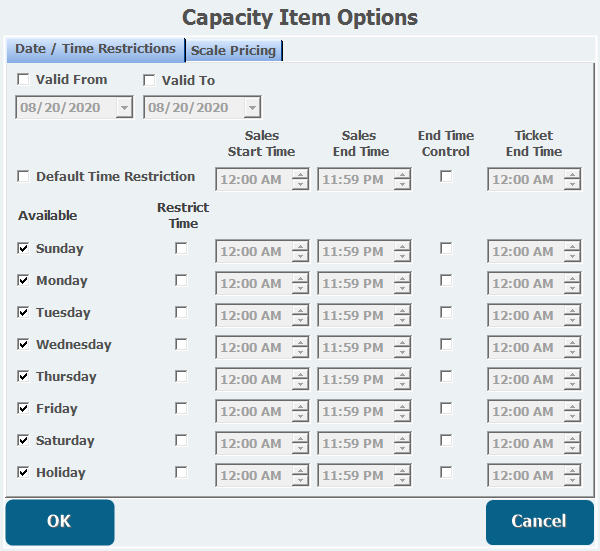
- Click Options.
- Using this menu you can set time/date restrictions and scale pricing.
- Using this menu you can set time/date restrictions and scale pricing.
- From the Date/Time Restrictions tab, set any time restrictions as necessary.
See this document for more information on End Time Control. - Open the Scale Pricing tab, if necessary.
- Scale pricing allows the price to change based on the number of items sold.
- Scale pricing allows the price to change based on the number of items sold.
- Click Add New Scale Pricing.
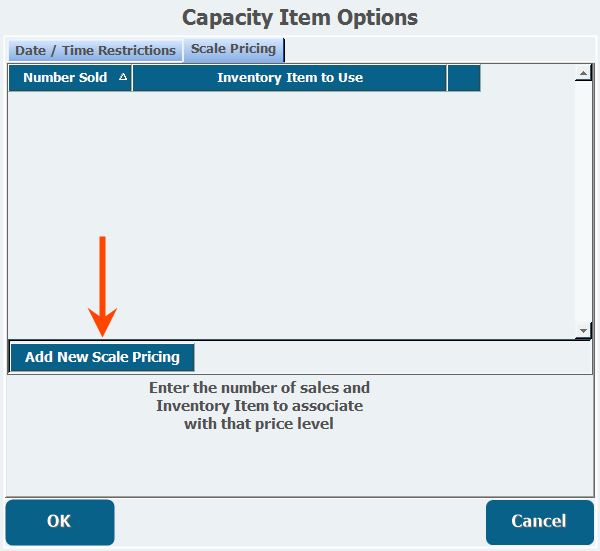
- Enter a Number Sold.
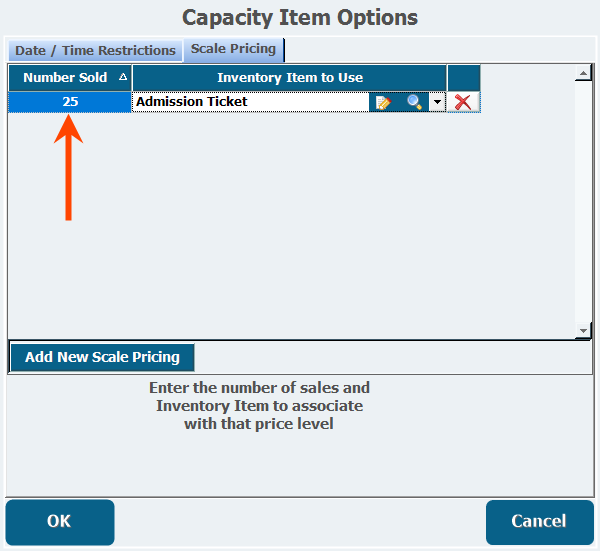
- Select the Inventory Item to Use for that price level.
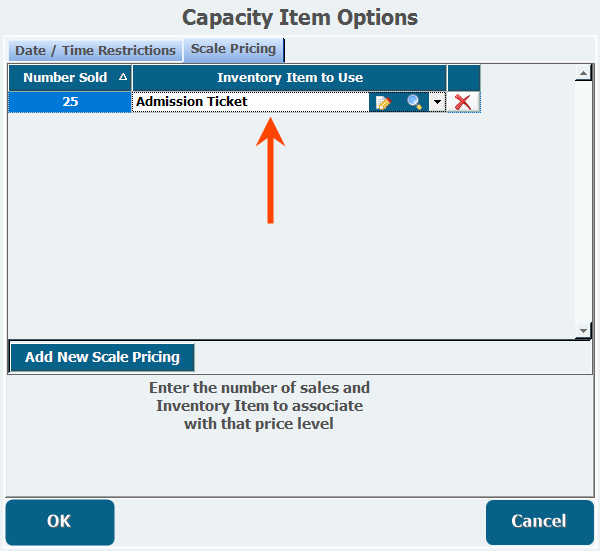
- Click OK.
Schedules
Schedules
To be used, an area needs a schedule 360014595894 area-schedDetails
Details
The Short Details field is a short text field that is for a brief description of the area that will appear in the area list on the webstore.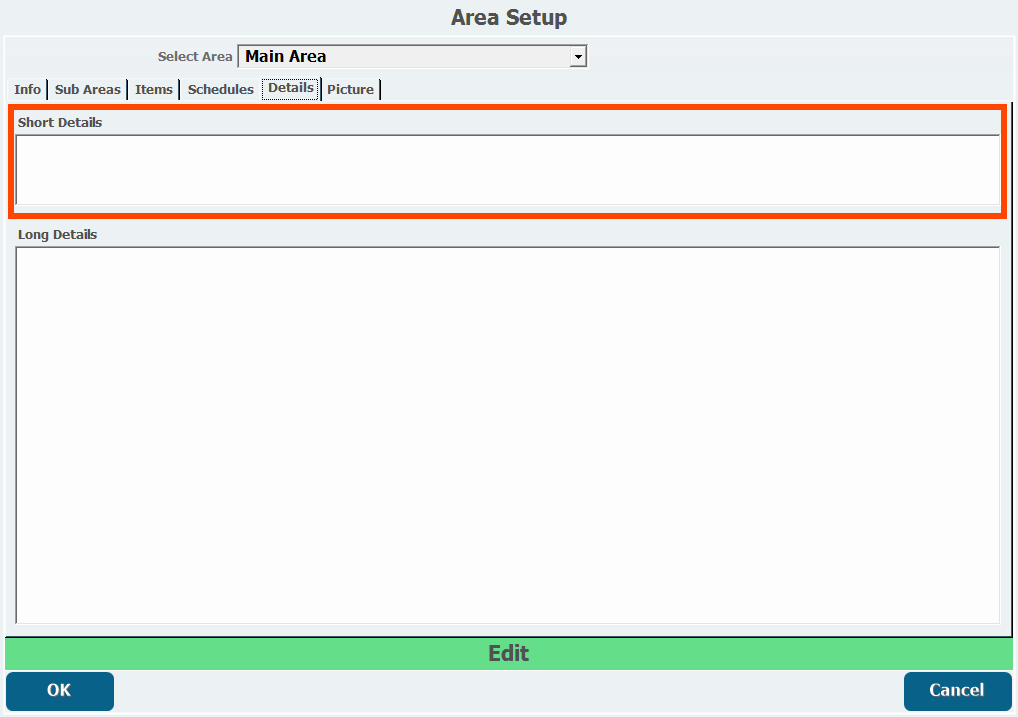
Long Details is a long text field for an expanded description of the area that appears when a user clicks into the area.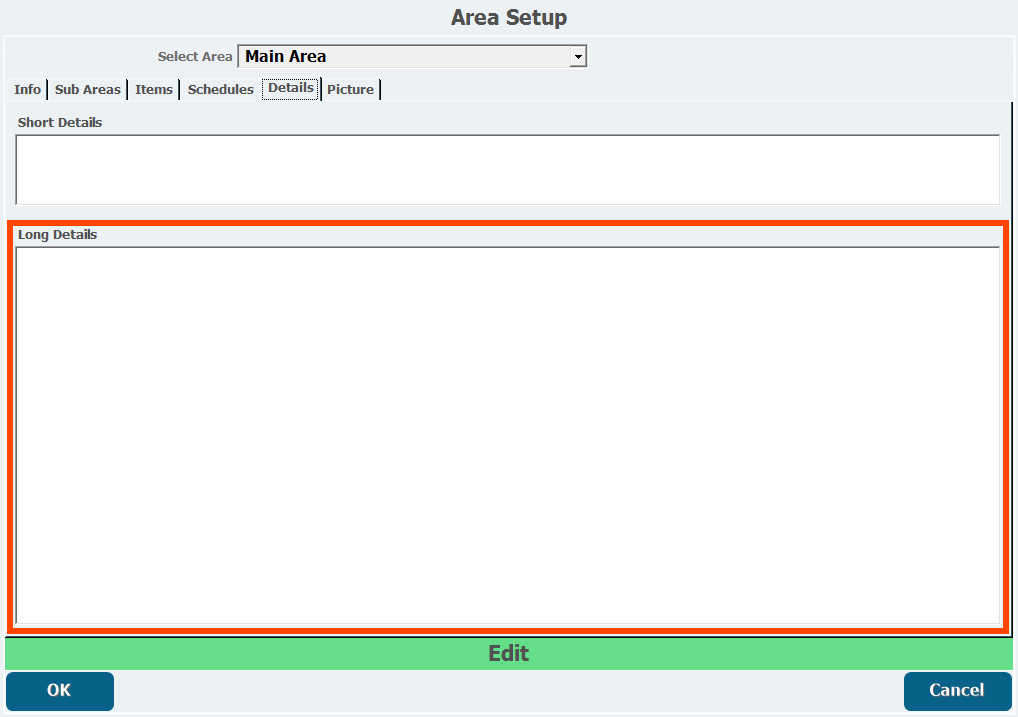
Picture
Picture
The Picture tab lets you add images to display on the webstore.
Adding a Picture or Thumbnail
- From the Picture tab in Area Setup, click Get Picture or Get Thumbnail.

- Click Load File.
- If there is a camera attached to the current station, you can take a new picture, otherwise you can locate a file on your computer.
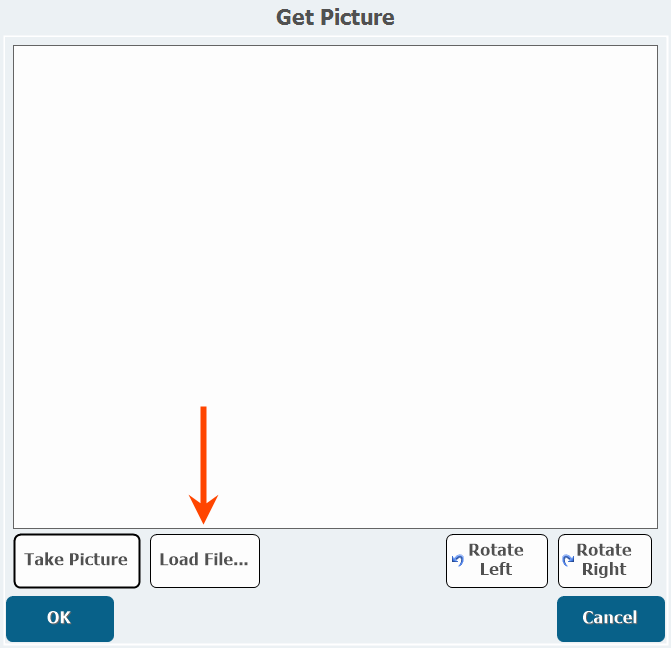
- If there is a camera attached to the current station, you can take a new picture, otherwise you can locate a file on your computer.
- Browse to the location of the image.
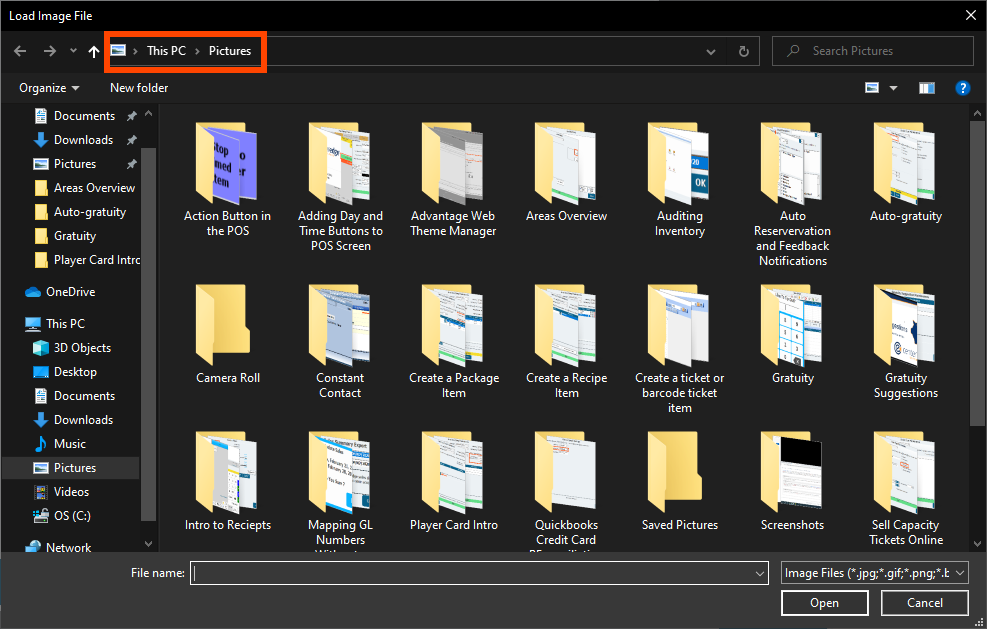
- Double-click the file.
- Click Rotate Left or Rotate Right if the image is not oriented the correct way.
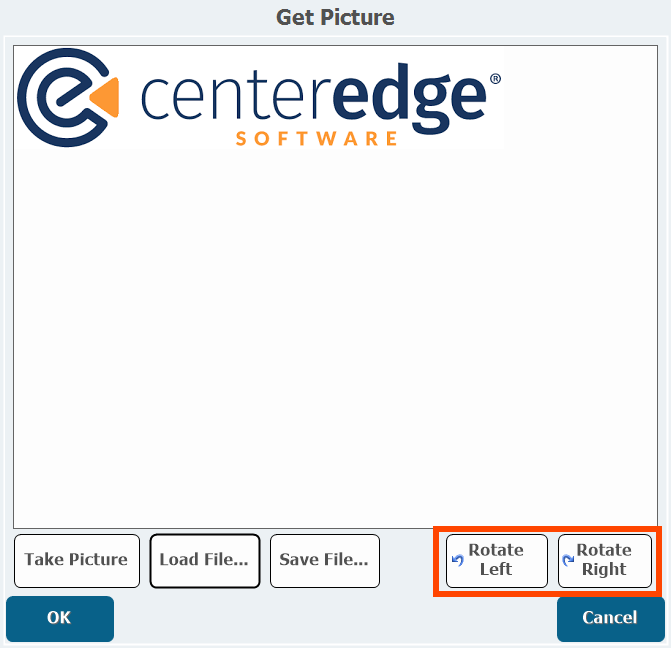
- Click OK.
Area Options
Beyond settings in individual areas, there are some other options you can configure, which will apply to all areas.
- From the Setup menu in Groups or Maintenance in Manager Console, double-click Groups Options.